To celebrate the last month of 2020 (and give a big kiss goodbye to the worst year of my life) I’m starting a series of short vlogs to go along with my current knits.
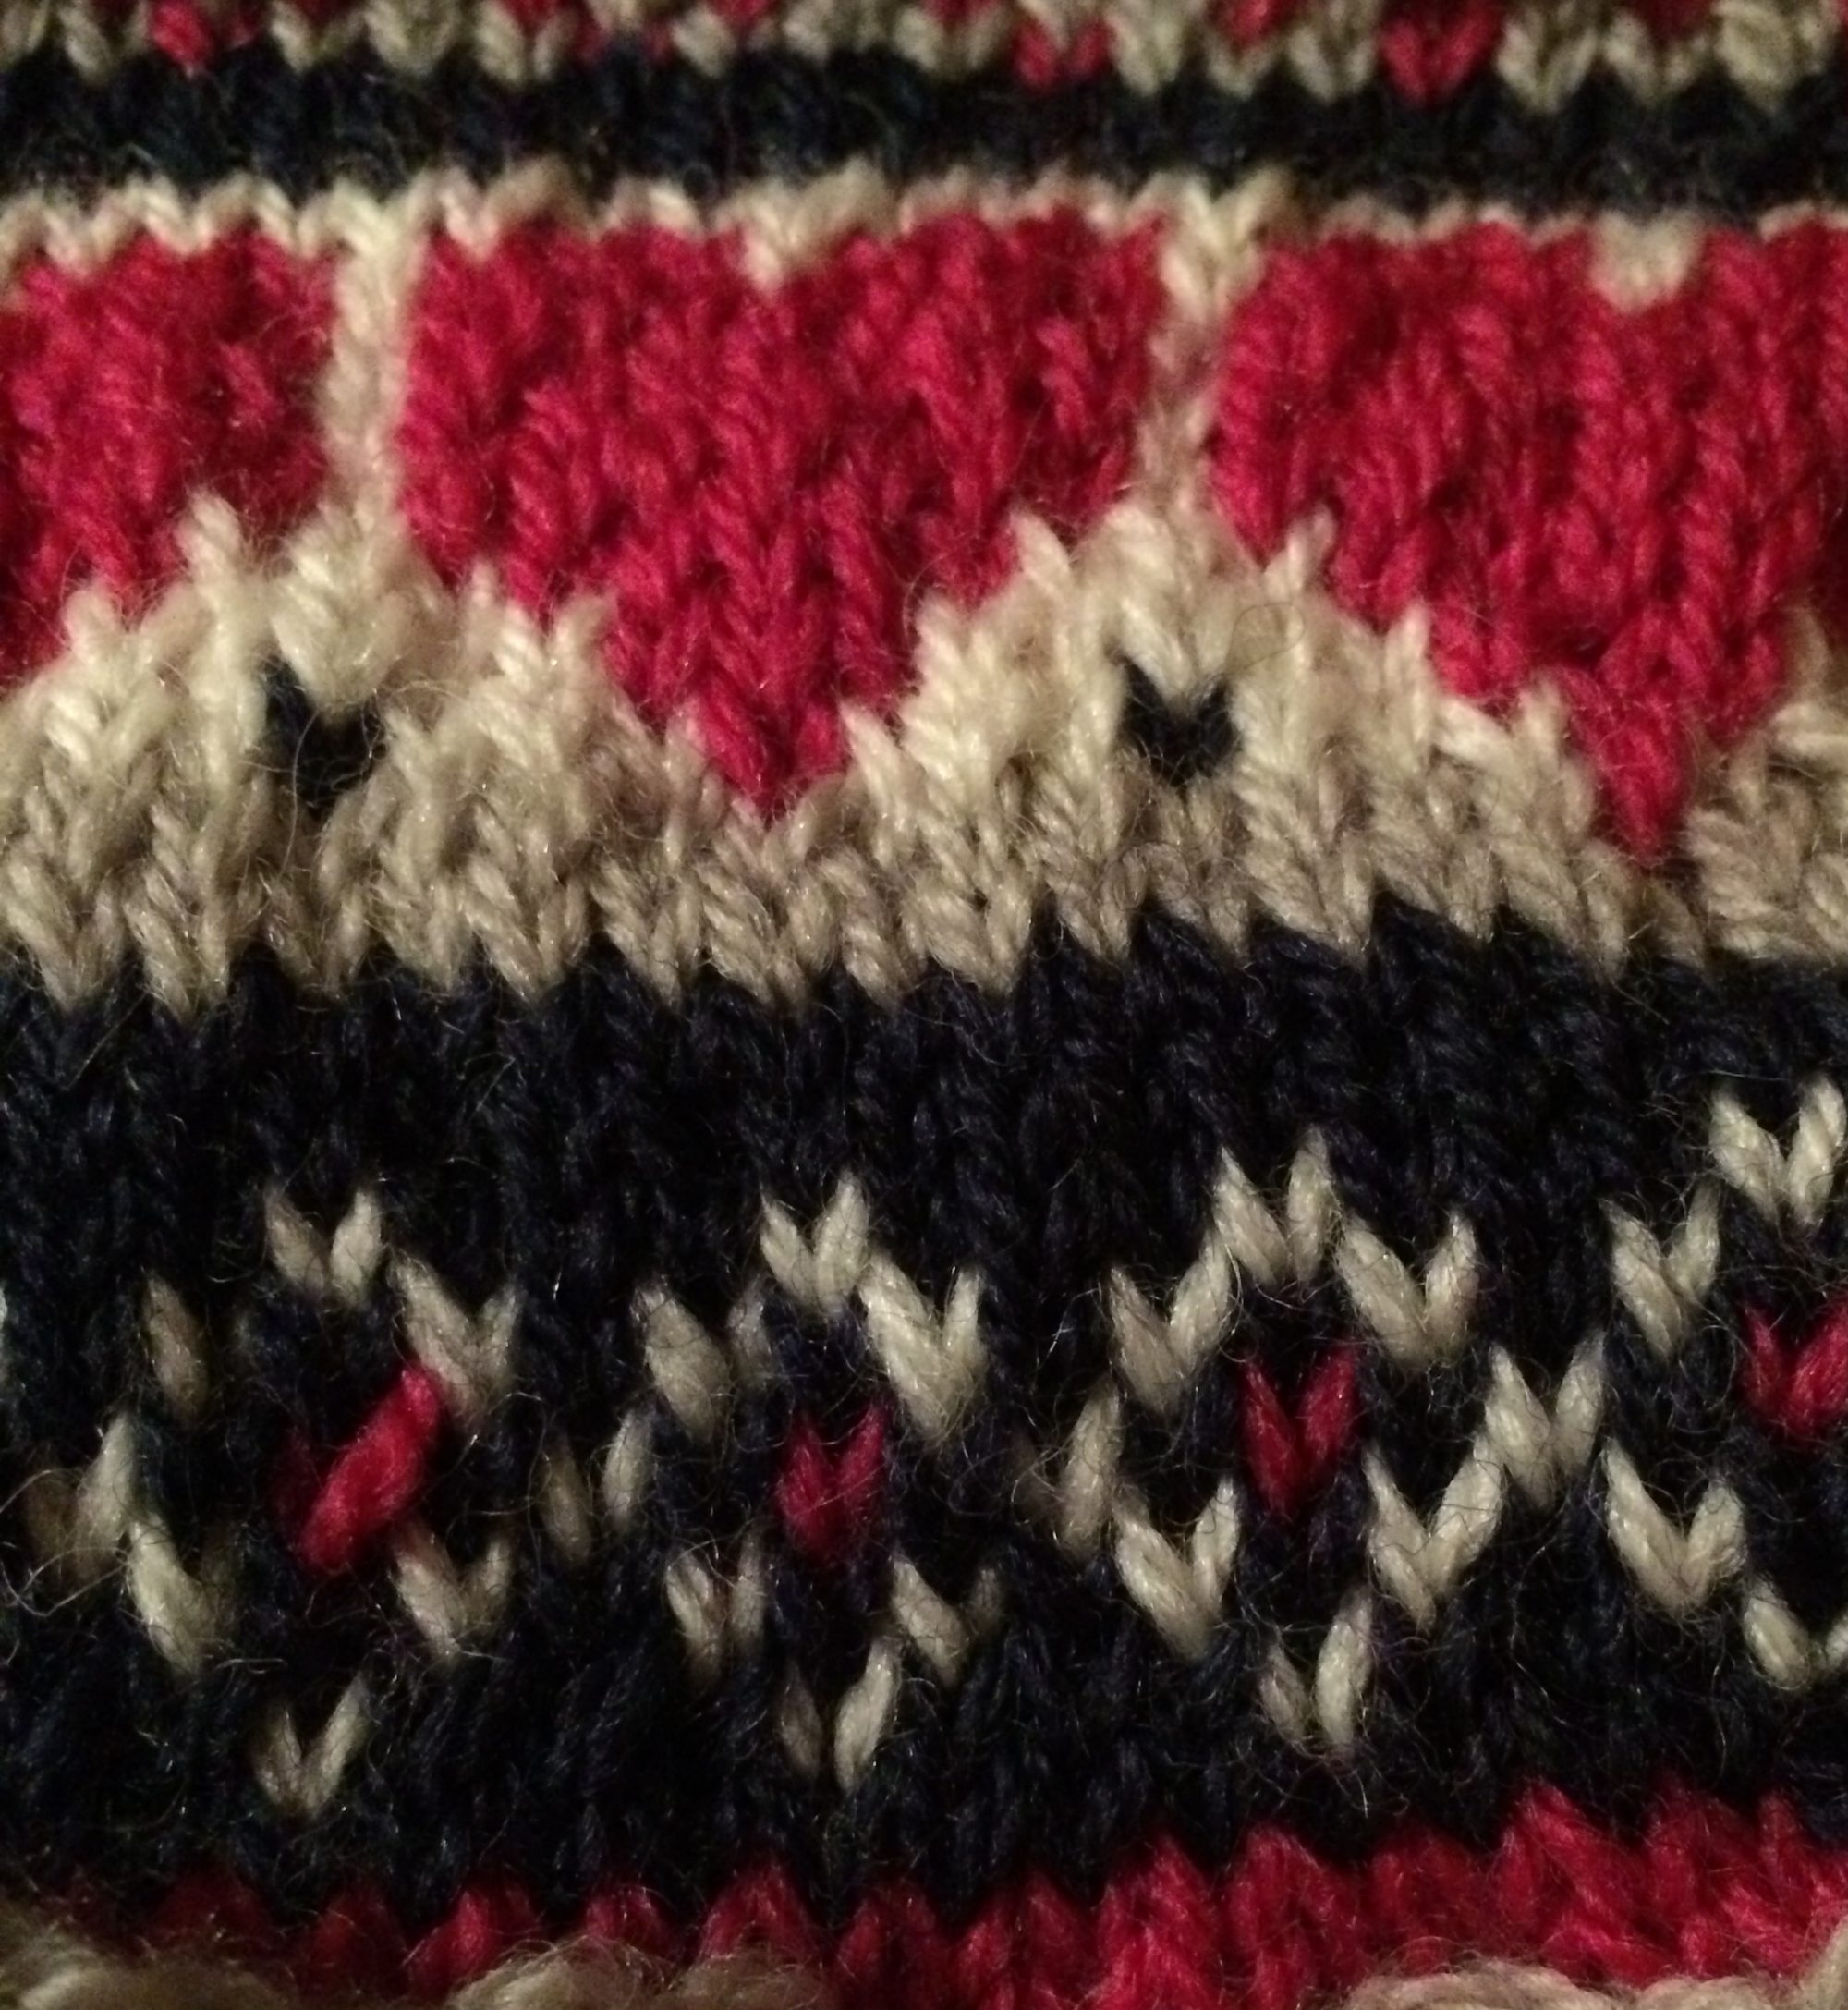
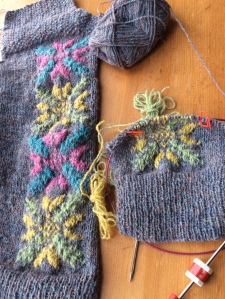
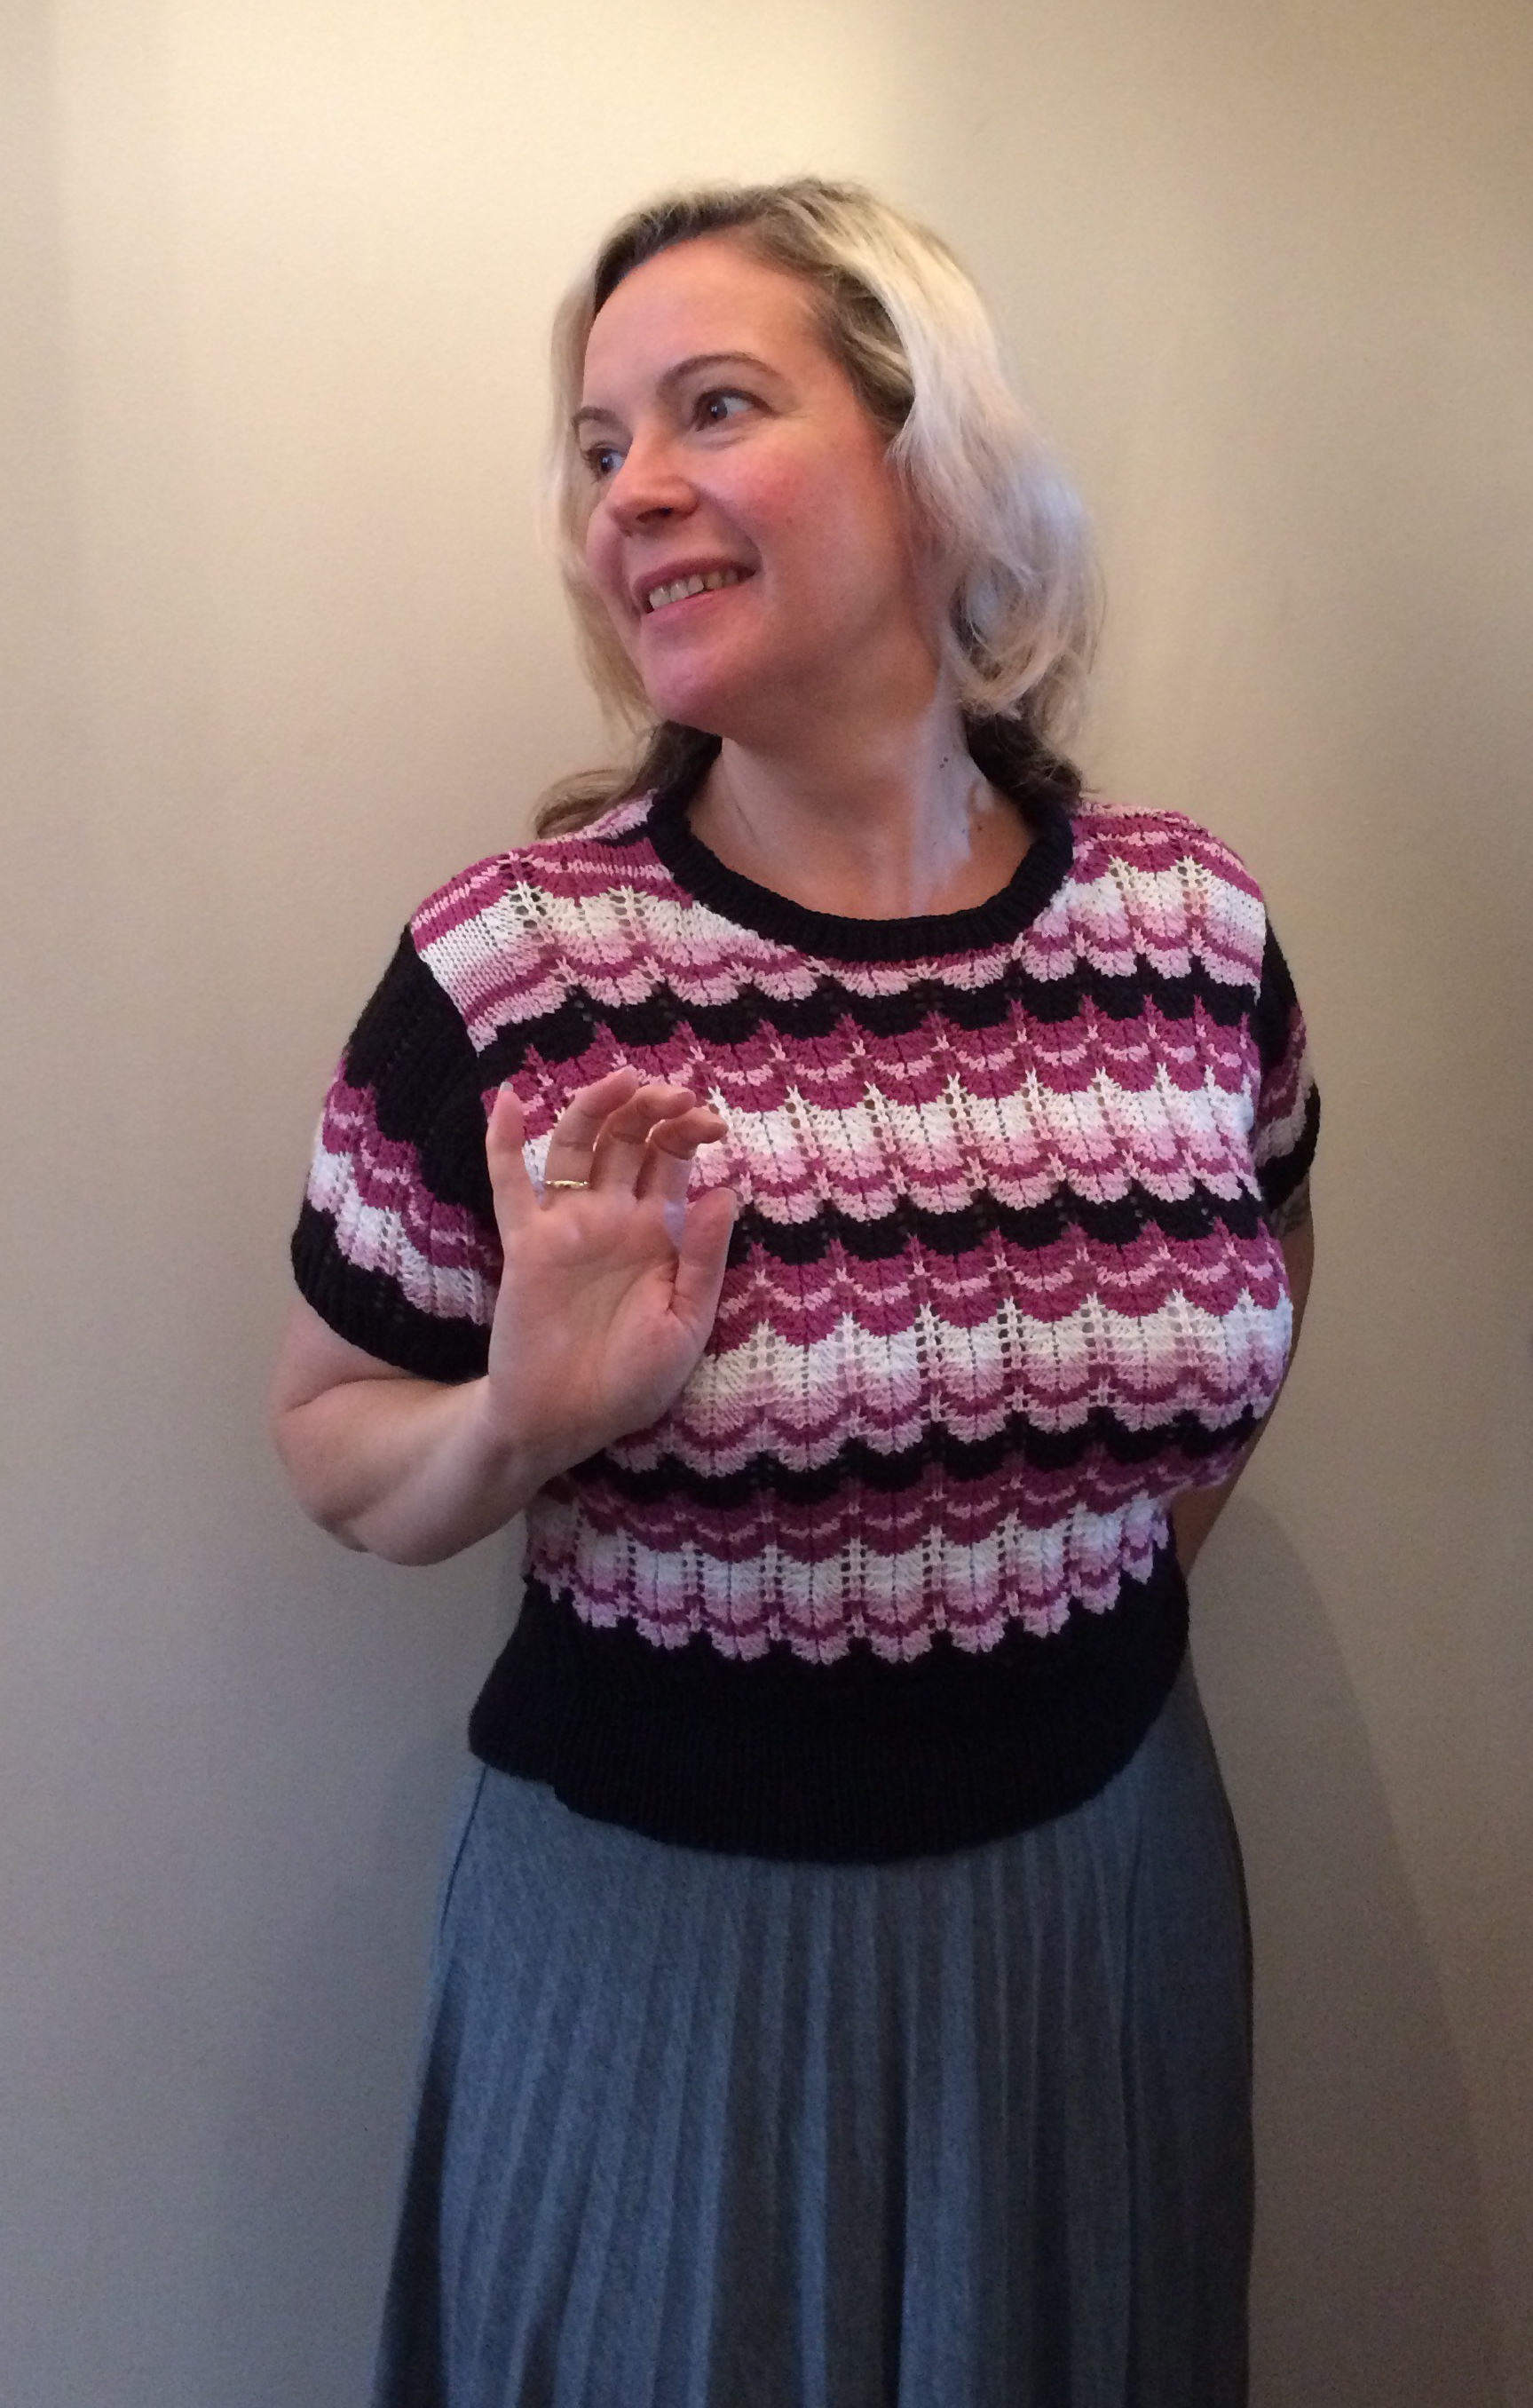
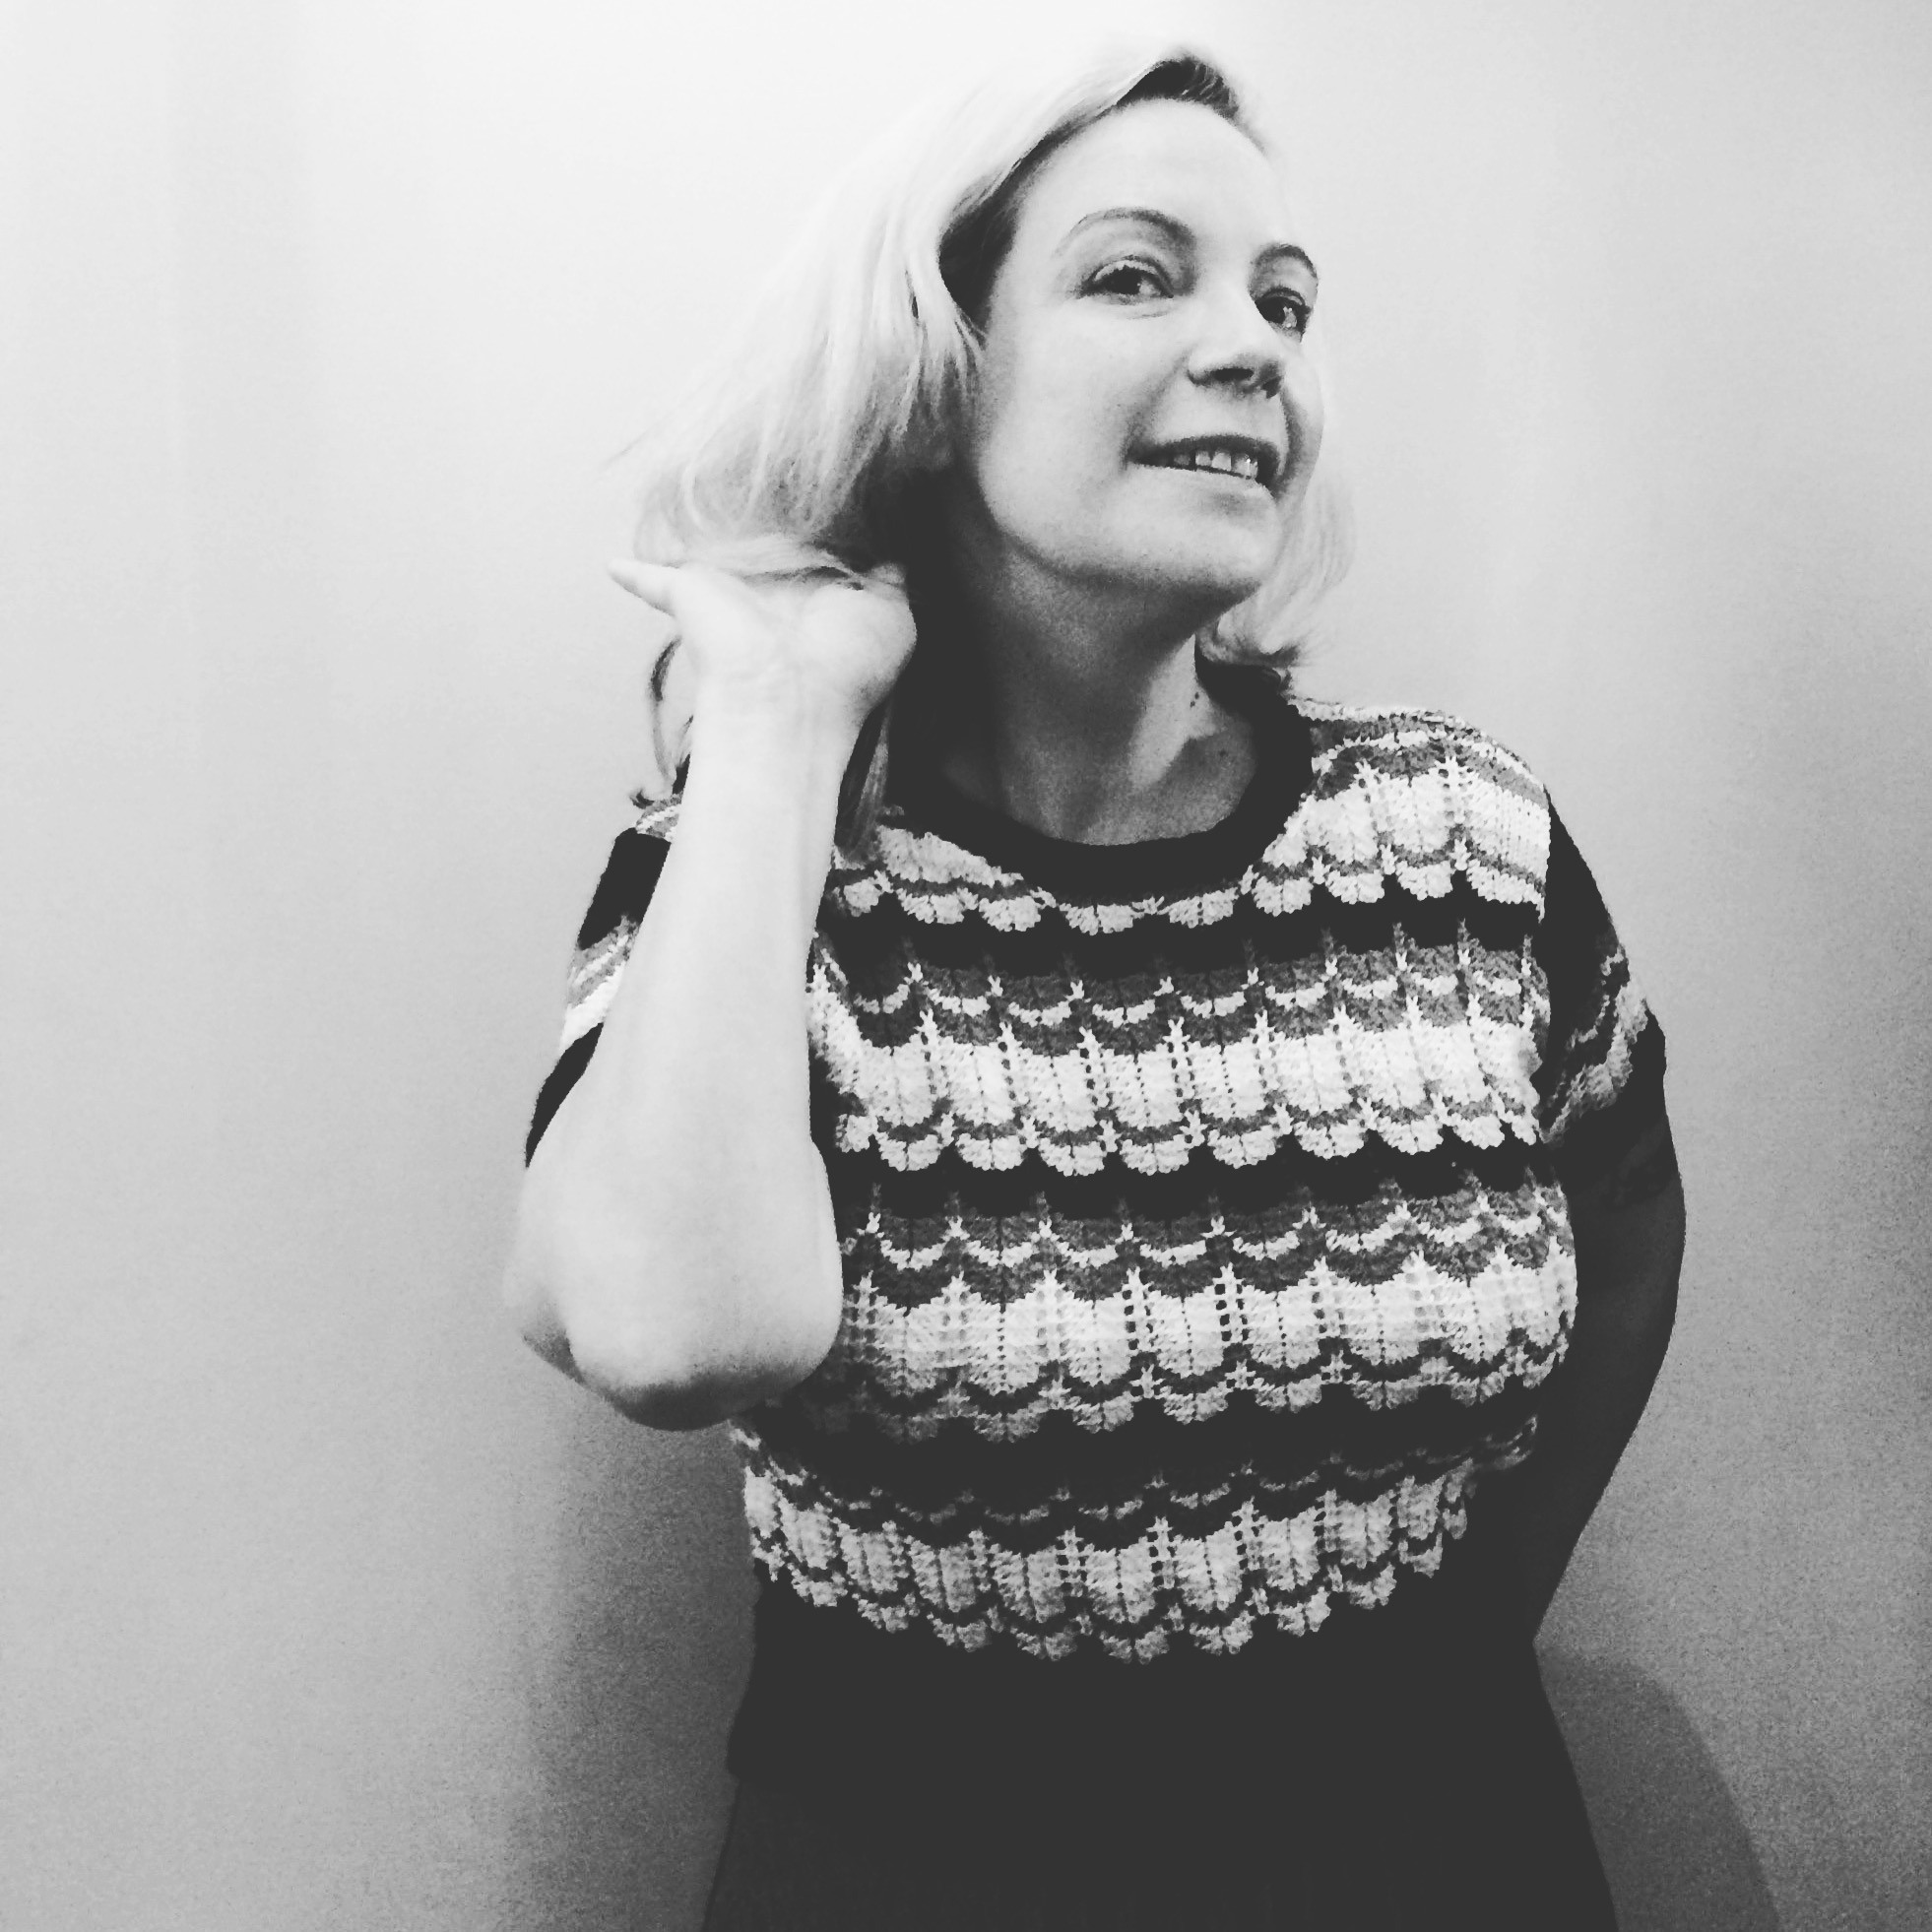
At the minute I’m working on a colourwork stranded top – a design containing a mixture of Fair Isle and intarsia techniques; made up of five jewel colours and a lovely heathered background colour – all part of Jamieson and Smiths 2 ply spindrift collection.
This first vlog demonstrates how I work with my strands of colour without the use of bobbins while keeping the work neat and tidy. This can be used for knitting and crochet, as well as other hand crafted textile projects such as crewel work, and helps stop the work becoming a tangled mess!!
Hope you enjoy this vignette and the rockabilly music, and keep an eye out for my next vlog of tips and techniques; gathered from over 30 years of studying, working and hobbying in textiles!
Since lockdown in March, though working from home; eating out to help out over the summer; and an officially Banksy which has appeared here in Nottingham over the last week; this year has been the strangest and toughest so far, for so many of us.
On the home front – it’s been a year that’s seen my knitting designs increase; my garden grow, my waistline expand and my exercise regime change beyond all recognition! I’ve spent more time designing new knitting patterns and developing my own flair for vintage inspired designs than in previous years; and I’ve found focussing on knitting has been a welcome respite for my mental health. Supporting small businesses has been really important to me throughout the year and this has led to an increased yarn stash; which encourages my creativity; promotes good mental health and means I have a new project lined up for when each current one ends!
As with most of us, it’s been a year for reflection; and my knitting needles have certainly helped manage the frustration of lockdown and isolation!
As we headed towards lockdown, I raced to buy balls of Louisa Harding 4ply Amitola from my local yarn shop http://www.yarnloft.co.uk/lh-amitola.htmlAmitola is a blend of 80% wool and 20% silk; and is a self striping yarn in a range of colours.
I had enjoyed knitting the stitch so much, that I decided to use the same stitch for the body of this jumper. I was interested in how the stripe would look and thought the blend of wool and silk would add a halo to the garment, which I liked so much in the Lace Row cardigan. I decided to knit and write the pattern flat; as i thought the strips would be too thin if I knitted the whole garment in the round. This jumper has short, dolman sleeves and a wide boat neckline; which creates an easy wearing garment that looks as good on it’s own, as it does layered over the top of a long sleeved top. It can be dressed up or down; and is certainly one of the easiest wearing jumpers I’ve designed.
50s Lace Jumper
As we moved into summer, I was drawn back to my yarn stash and a lace vintage pattern I’d knitted a couple of years ago. I love the Ribbon Threaded Jumper from Susan Crawford’s ‘A Stitch In Time’ pattern book https://susancrawfordvintage.com/products/astitchintime-vol2 and had some shell pink cotton Coquette which I’d purchased 18 months previously. I remembered that the lace pattern was easy to follow; but decided to set myself the task of knitting this in the round!!
I have been impressed at how well this has come out and have enjoyed the mental challenge it’s taken. There was some checking and rechecking to be done, to ensure I had the right stitch count to incorporate the pattern at the sides; and at one point I failed to follow a part of the pattern that didn’t need altering and knitted one massive sleeve three sizes too big, which was hilarious! Once I had rectified my mistake; and attached the sleeves to the body, I decided to knit the yoke flat; to ensure the YON and K2 tog sat right. Remembering my disastrous fair isle top last year, which needed reworking smaller; I reduced my needle size to compensate for the tension difference between working in the round and working flat. I shan’t make that mistake again!
Work In Progress
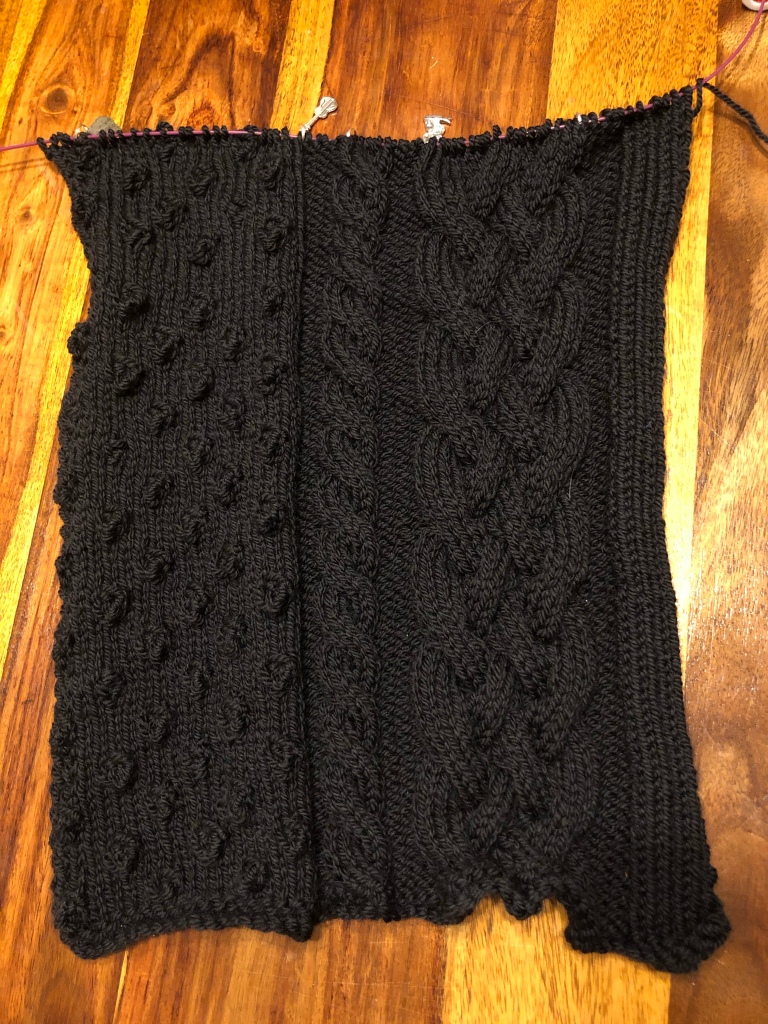
My current knit in a rework of the 1920s cable sampler stole I originally knitted back in 2017
I love this garment; but wanted to try this in an alternative colour and make it longer too. I decided to try this in black – a colour I’ve always steered away from, as dark colours have a tendency to not create enough light and shadow on cables for my liking. I’m using a beautiful soft, shiny yarn from my local yarn shop from Debbie Bliss. This is a 100% Falkland aran weight wool https://www.debbieblissonline.com/product/yarn/falkland-aran/which has a sheen and softness all of it’s own. Although a bit splitty, this wool is lovely to work with – and I’m certainly a fan!
I’m currently working on the main body of the garment and I’m pleased with how it’s coming on; and looking forward to wearing this once it’s finished!
And Next…well who knows! Stay safe and well peeps; and remember to look after your physical and mental health
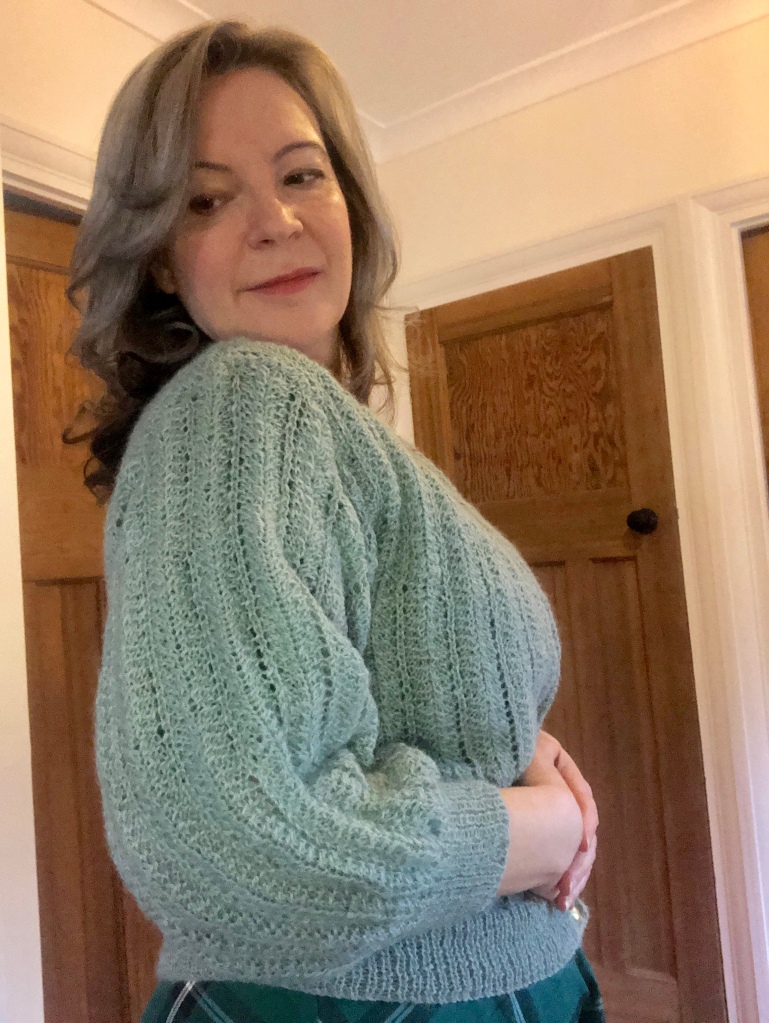
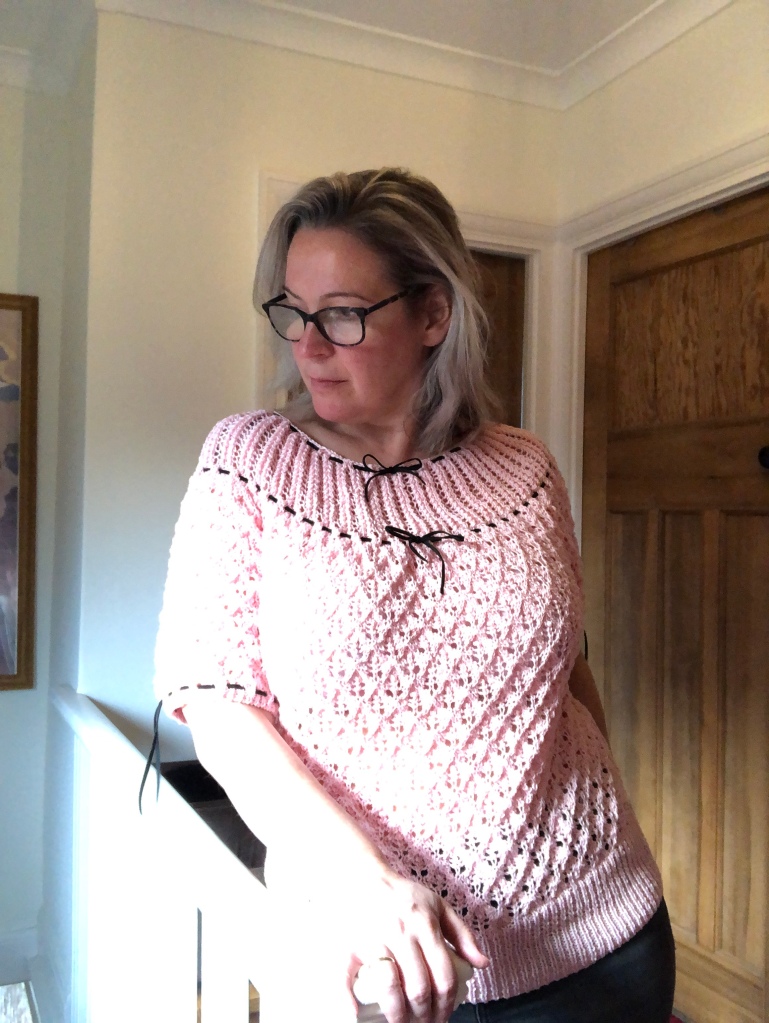
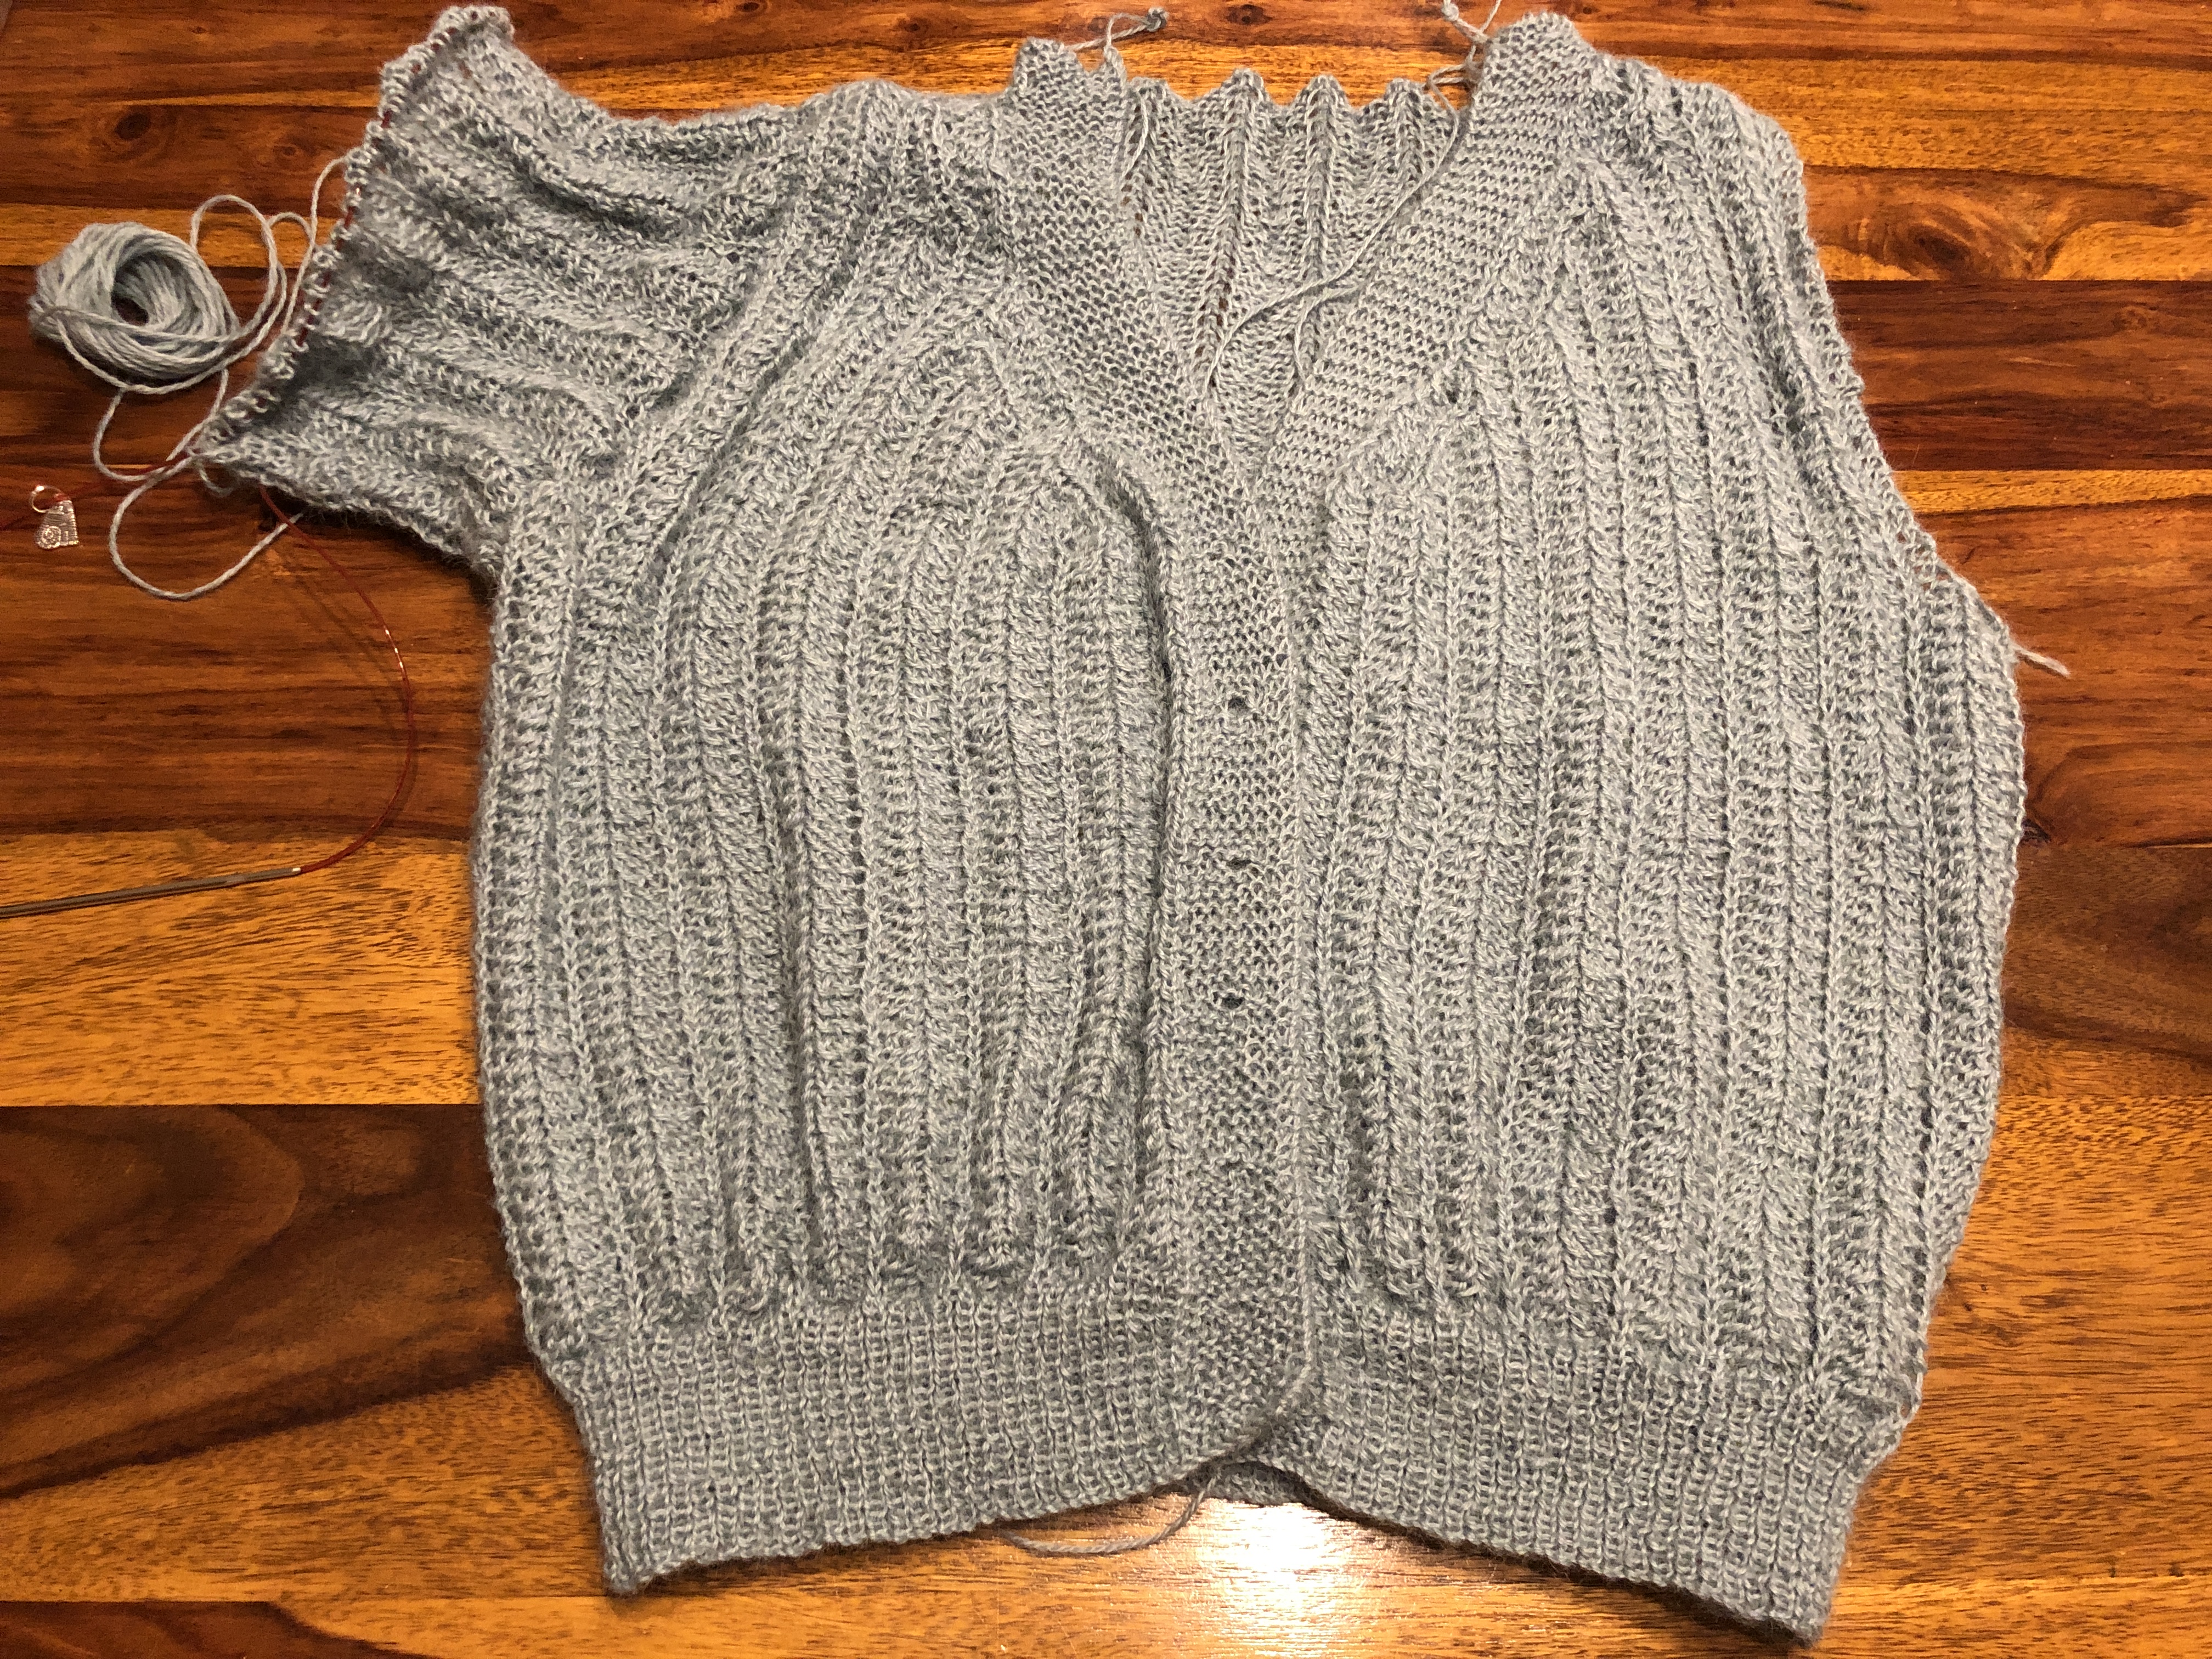
WIP Last month I started a new work in progress – my first designed, long sleeved, v-neck lace cardigan.
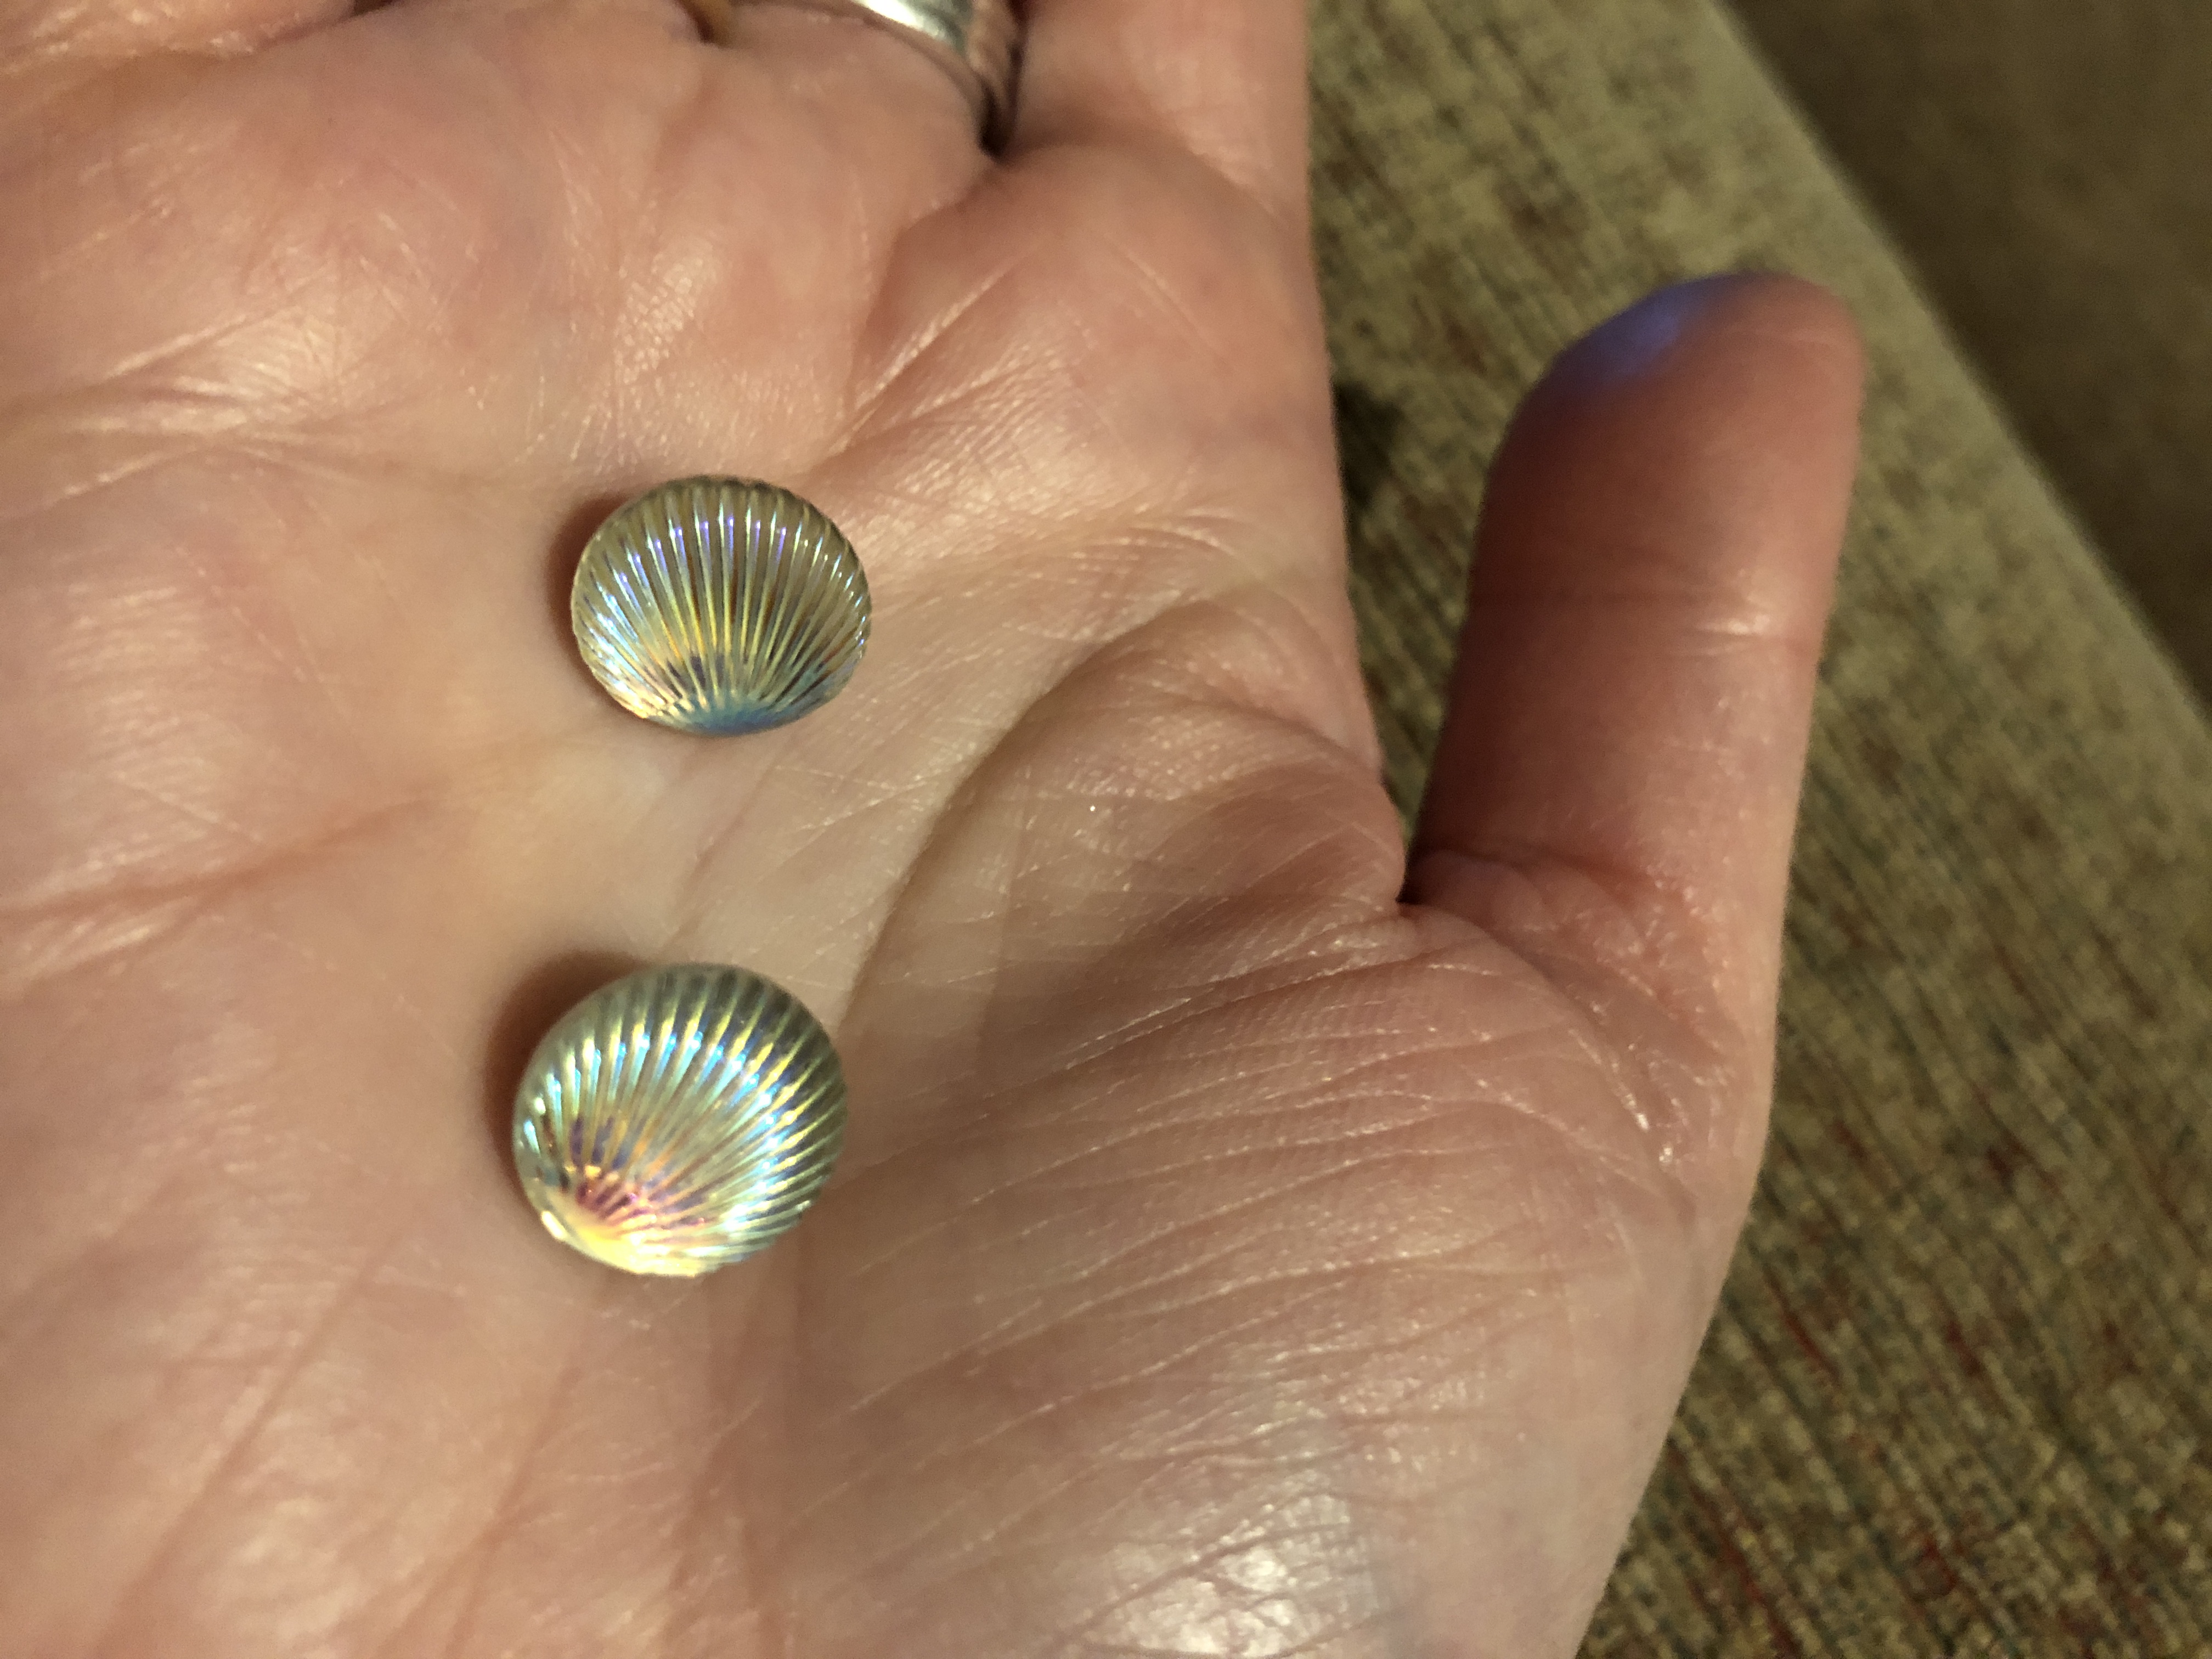
I had a number of beautiful shell shaped iridescent buttons with an aurora borealis hue that I was keen to use on the garment; and I wanted this cardigan to be a real showstopper; with a number of qualities. The cardigan needed to be warm, it needed to look like a vintage garment; and it needed to look as good over the top of a swing dress; as it did teamed with a denim skirt.
Art Deco style iridescent shell buttons
I‘m not an experienced hand lace knitter, so intricate patterns (as yet) are beyond my ability. I love the Old Shetland Shale Stitch described by Rae Compton in her ‘Practical Knitting’ book. I inherited this book from my grandma, a skilled knitter herself; and along with other volumes of knitting and sewing books I inherited from her; Rae Compton continues to be a source of inspiration.
I wanted a stitch pattern that would be a repeat of no more than four rows; but looked more intricate than it was. I decided to shelve Old Shetland Shale Stitch; and instead settled on another stitch I’ve used before. This stitch was used in a 1945 jumper pattern. The pattern is now in the public domain and archived in the V&A Museum in Londonhttps://www.vam.ac.uk/articles/1940s-knitting-patternsThe stitch is a two row repeat, with the second row being a purl; so is super easy to remember and execute!
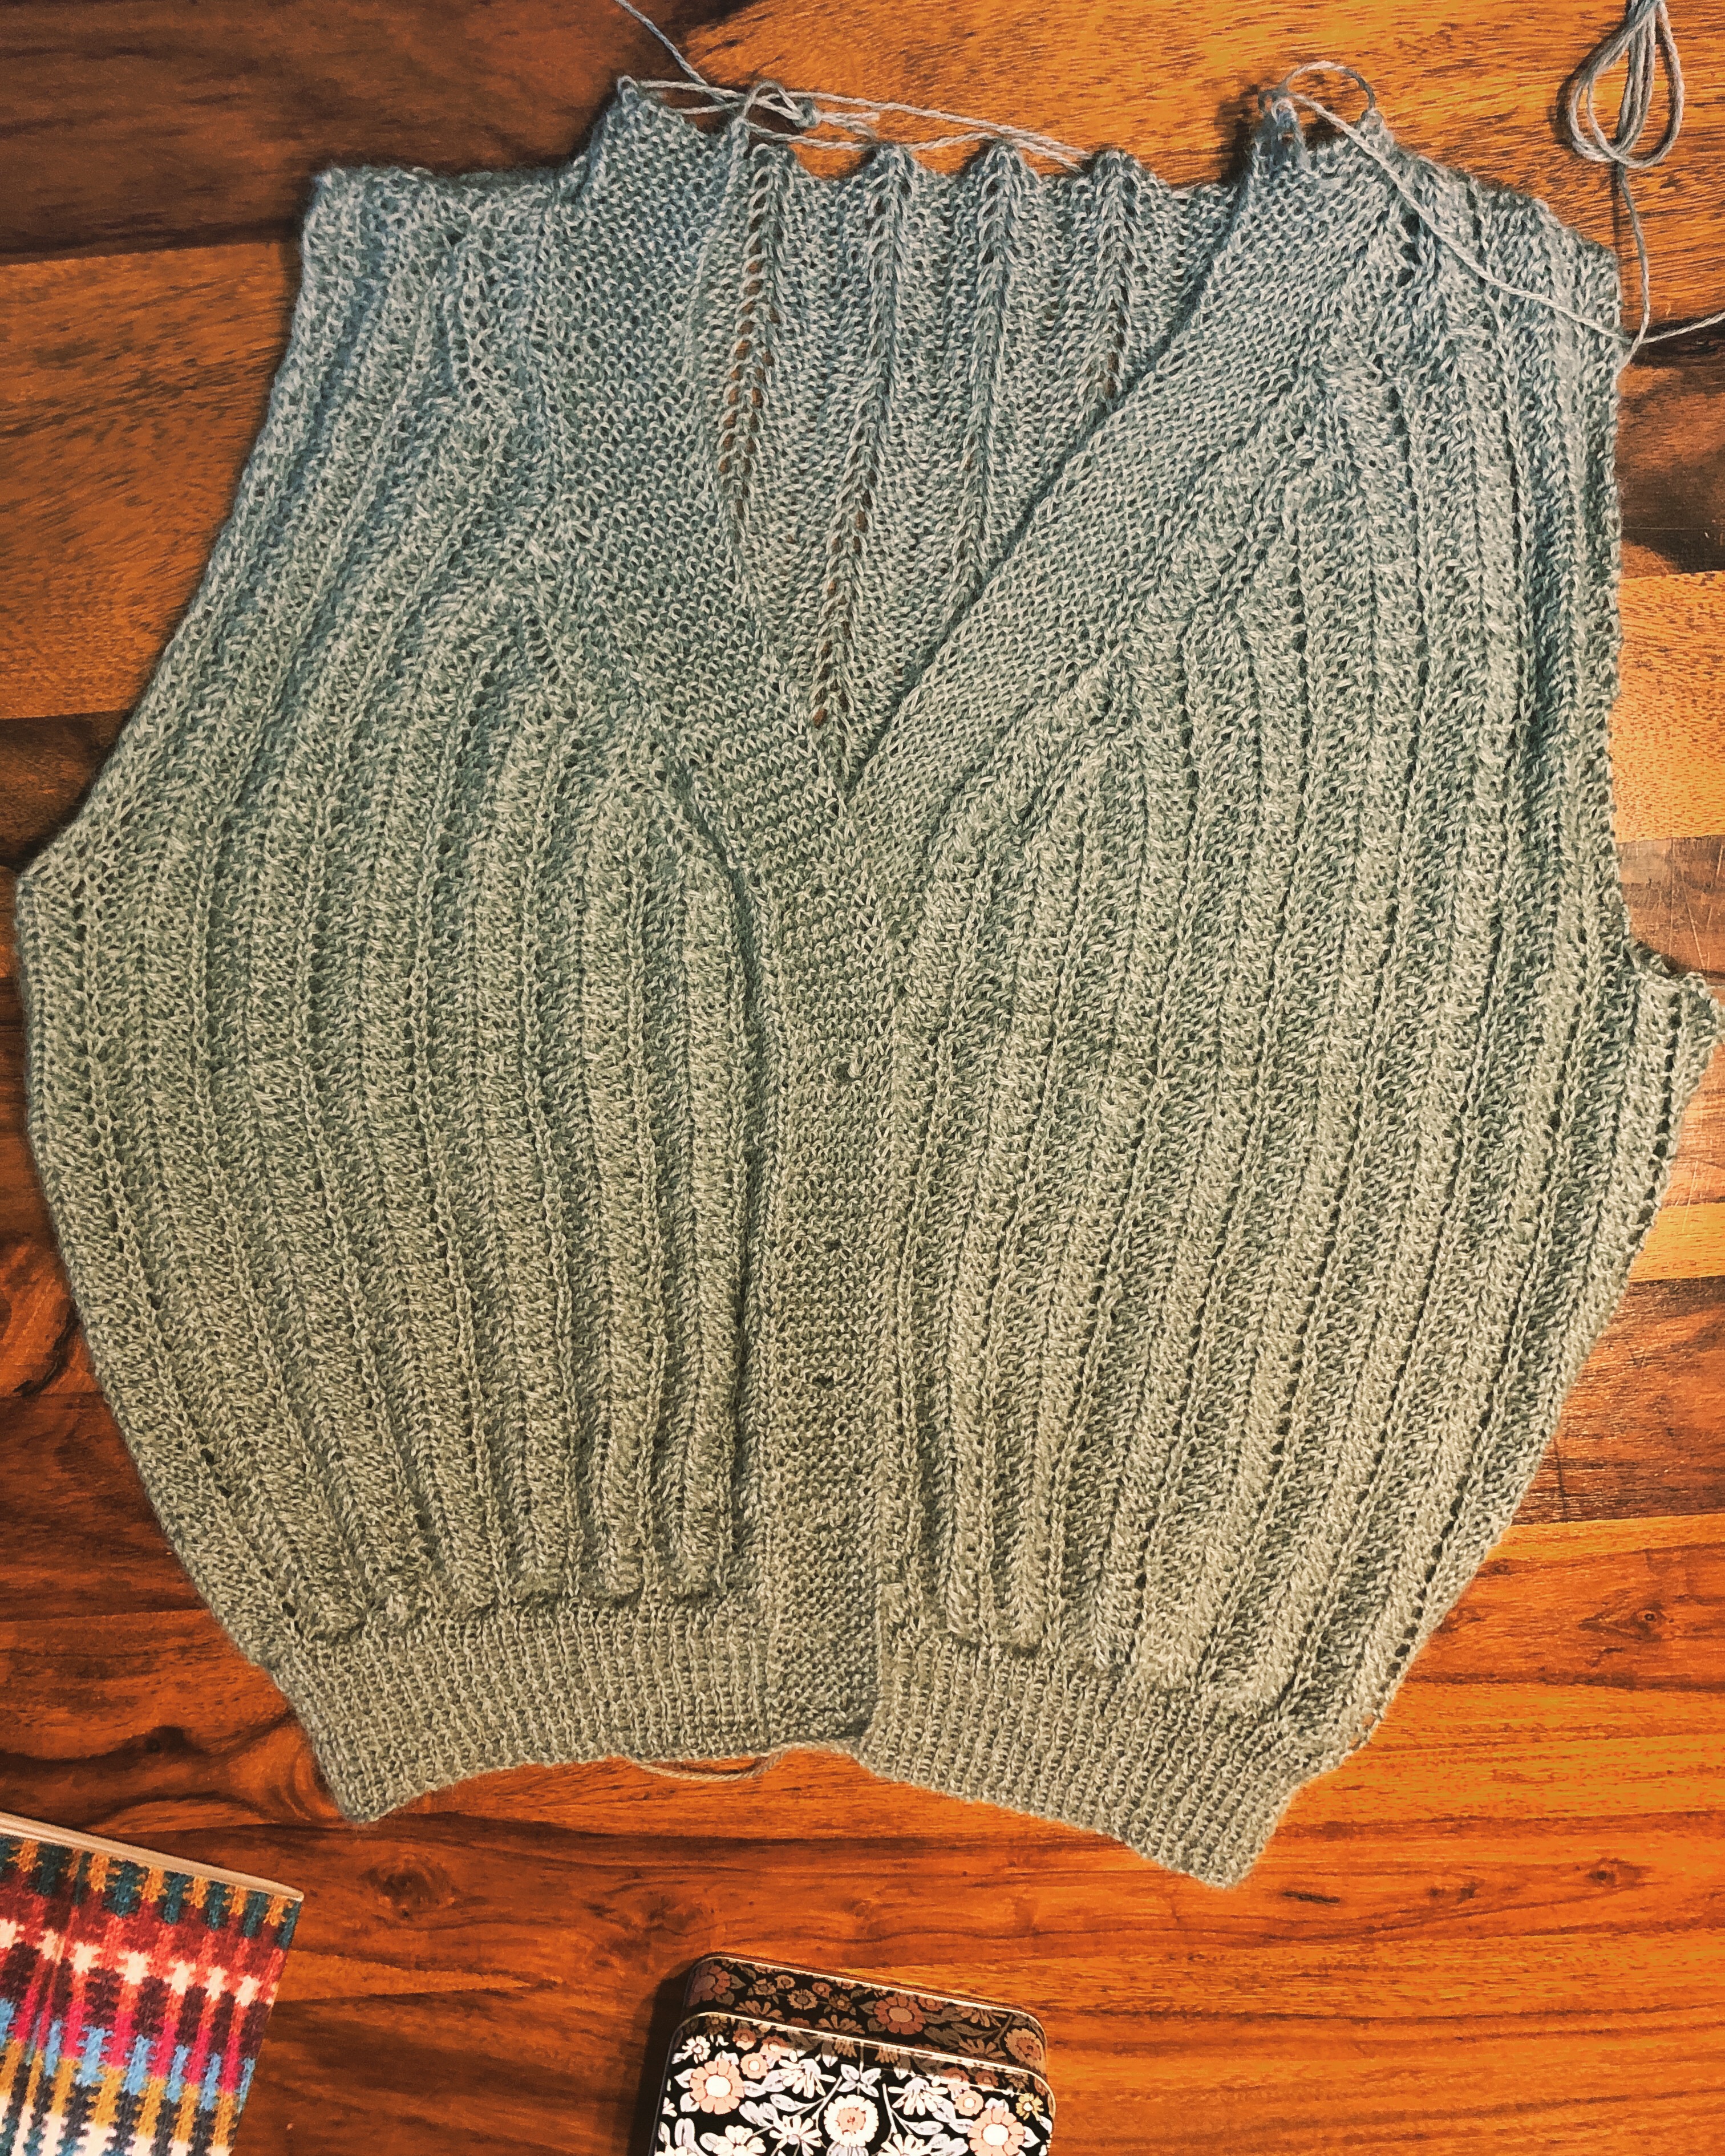
I have a number of skeins of Baa Ram Ewe’s Titus 4 ply range in my yarn stash. Titus is a mix of 70% British wool and 30% British alpaca. It’s a lovely yarn to work with, with a soft halo from the alpaca, but with the stability of wool. The lace stitch with it’s yarn overs to make the eyelets help to trap air; and combined with the comfort and softness of the Titus yarn, the cardigan will be warm and snuggly.
Body of cardigan. Titus 4 ply yarn knitted in ‘Hull’ a beautiful soft mint green – perfect for winter to spring
I decided to compliment the Art Deco style buttons by creating a 1930s silhouette to the cardi. I used an extra wide waistband rib at the bottom, which will be repeated on the cuff. The lace body creates a ‘blouson’ effect over the waistband, creating the classic 1930s style top.
So far it’s been a pleasure to knit! Working out how to decrease the stitches for the v-neck while maintaining the lace pattern has required some problem solving; but that’s part and parcel of the design process for me!
I’m hoping to finish this cardi within the next three weeks; and look forward to wearing it through the end of the winter season and into the beginning of spring.
Wishing you all a happy new year. For me, I hope to make 2020 a year full of Peggy Lilly Vintage designs!
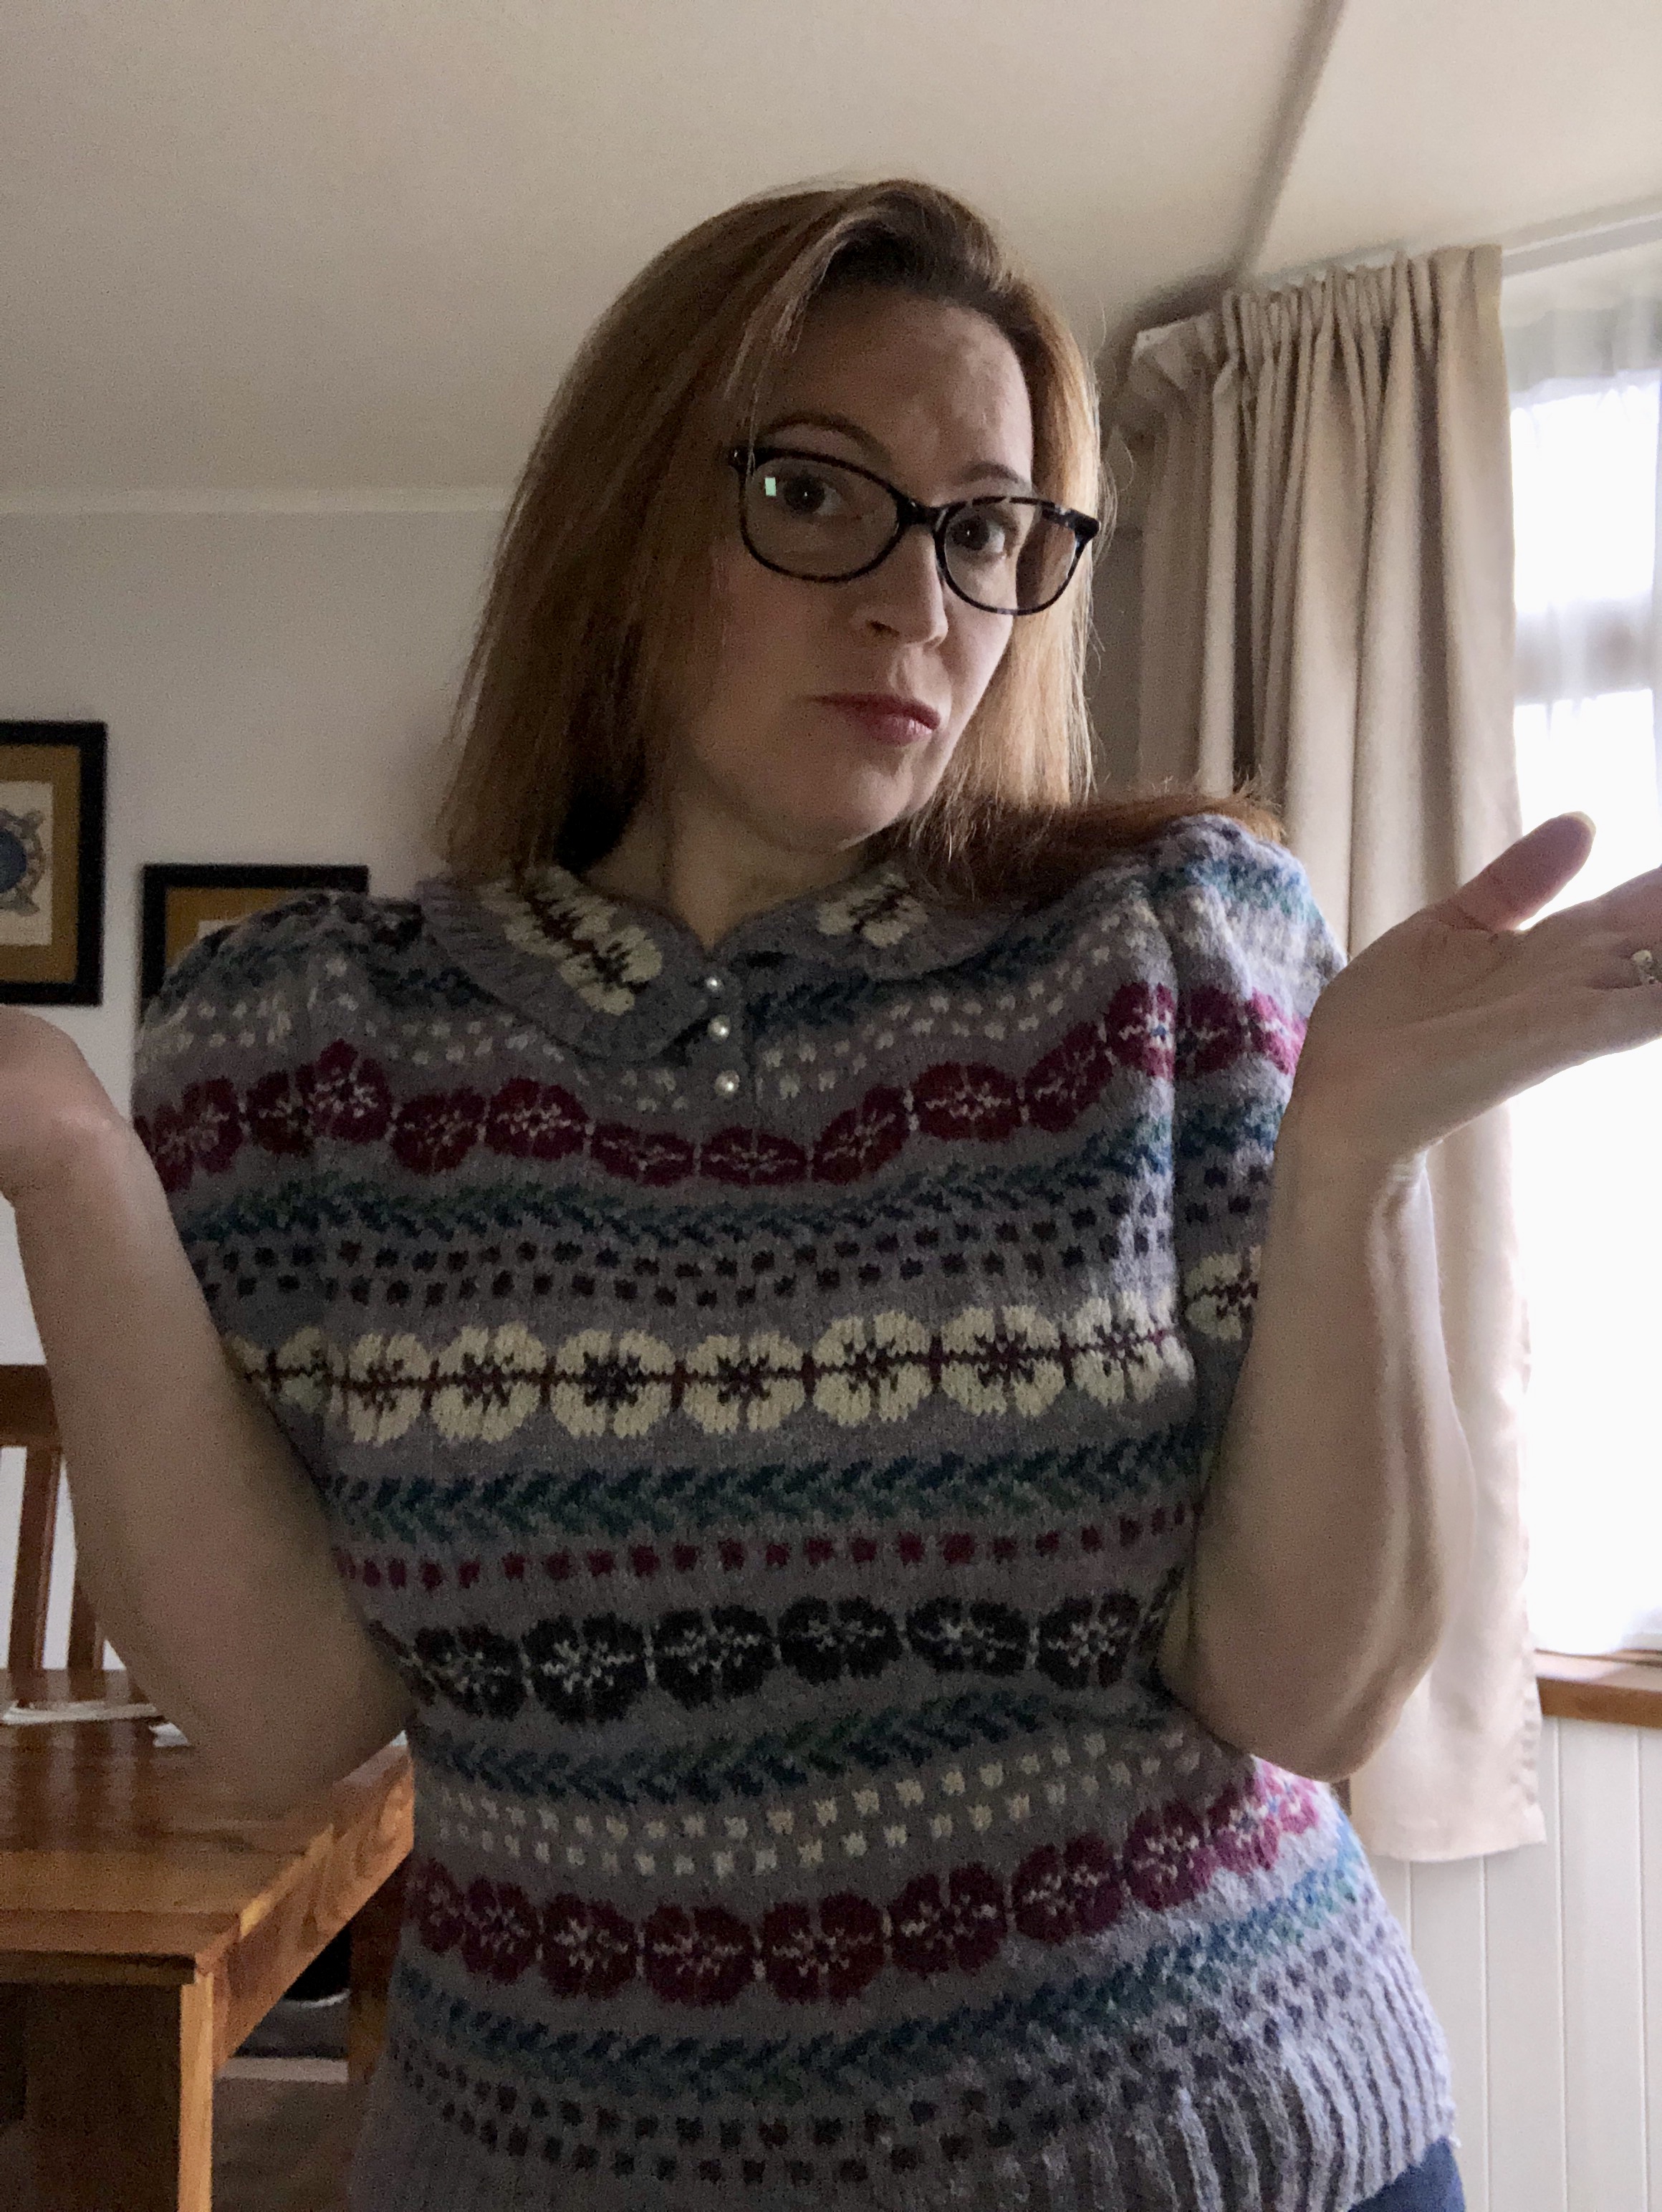
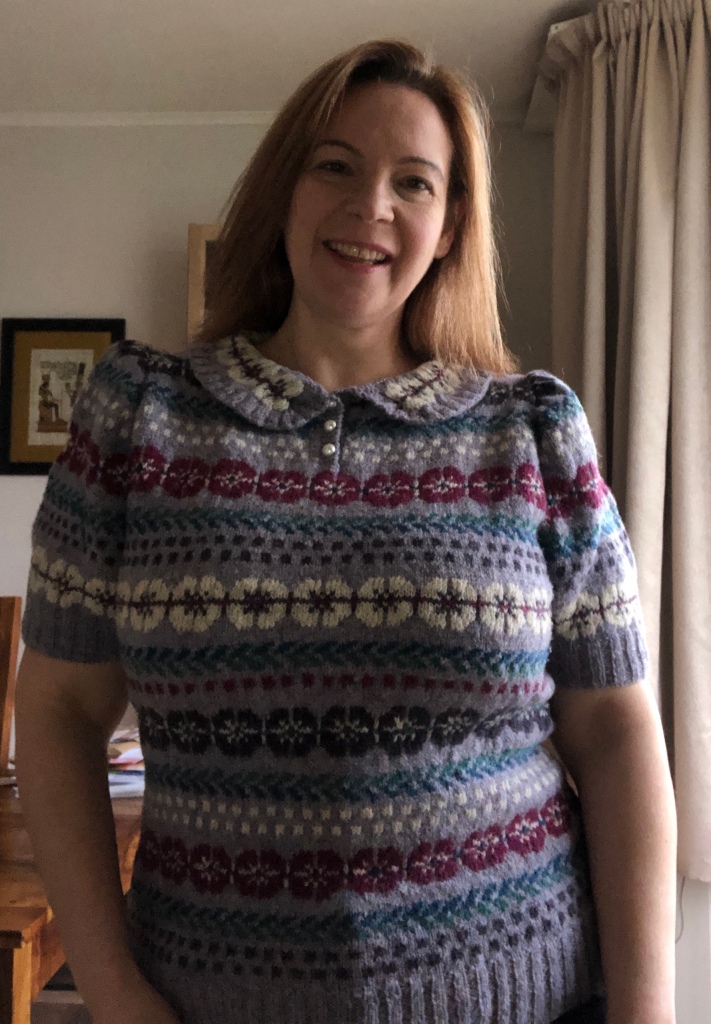
Earlier this year I finished a fair isle jumper, complete with placket and pearl buttons; and a Peter Pan collar. A real pleasure to knit and oh! So very vintage!!
The garment pattern was based on a standard fair isle sweater, though I used my own fair isle pattern which was more in keeping with my own style.
I started in earnest by drawing out my fair isle schematic pattern, choosing my colours, swatching colour ways…and quickly settled on a heathered background and five complementary solid colours. I chose pearl buttons to repeat one of the solid vintage cream colours I was using; and off I went!!
I decided to knit the jumper in the round, rather than in the flat; and ensured I included additional stitches for the front bust area to accommodate my hourglass figure (ladies, we all know there’s nothing worse than a overly tight sweater – stretched stitches aren’t the best look to go for!….)
The project went really well, the colours looked fabulous together, the garment blocked nicely (don’t you just love Jamieson & Smith) and I set about sewing up the shoulders, setting in the sleeves, adding the Peter Pan collar and pearl buttons….
and then….oh-oh!!?!
WHAT HAPPENED??!? Where did these shoulders come from??!
Dallas TV show circa 1980s anyone??
I know that I’d decreased the stitches I’d increased for the bust; so that wasn’t the problem with the shoulders.
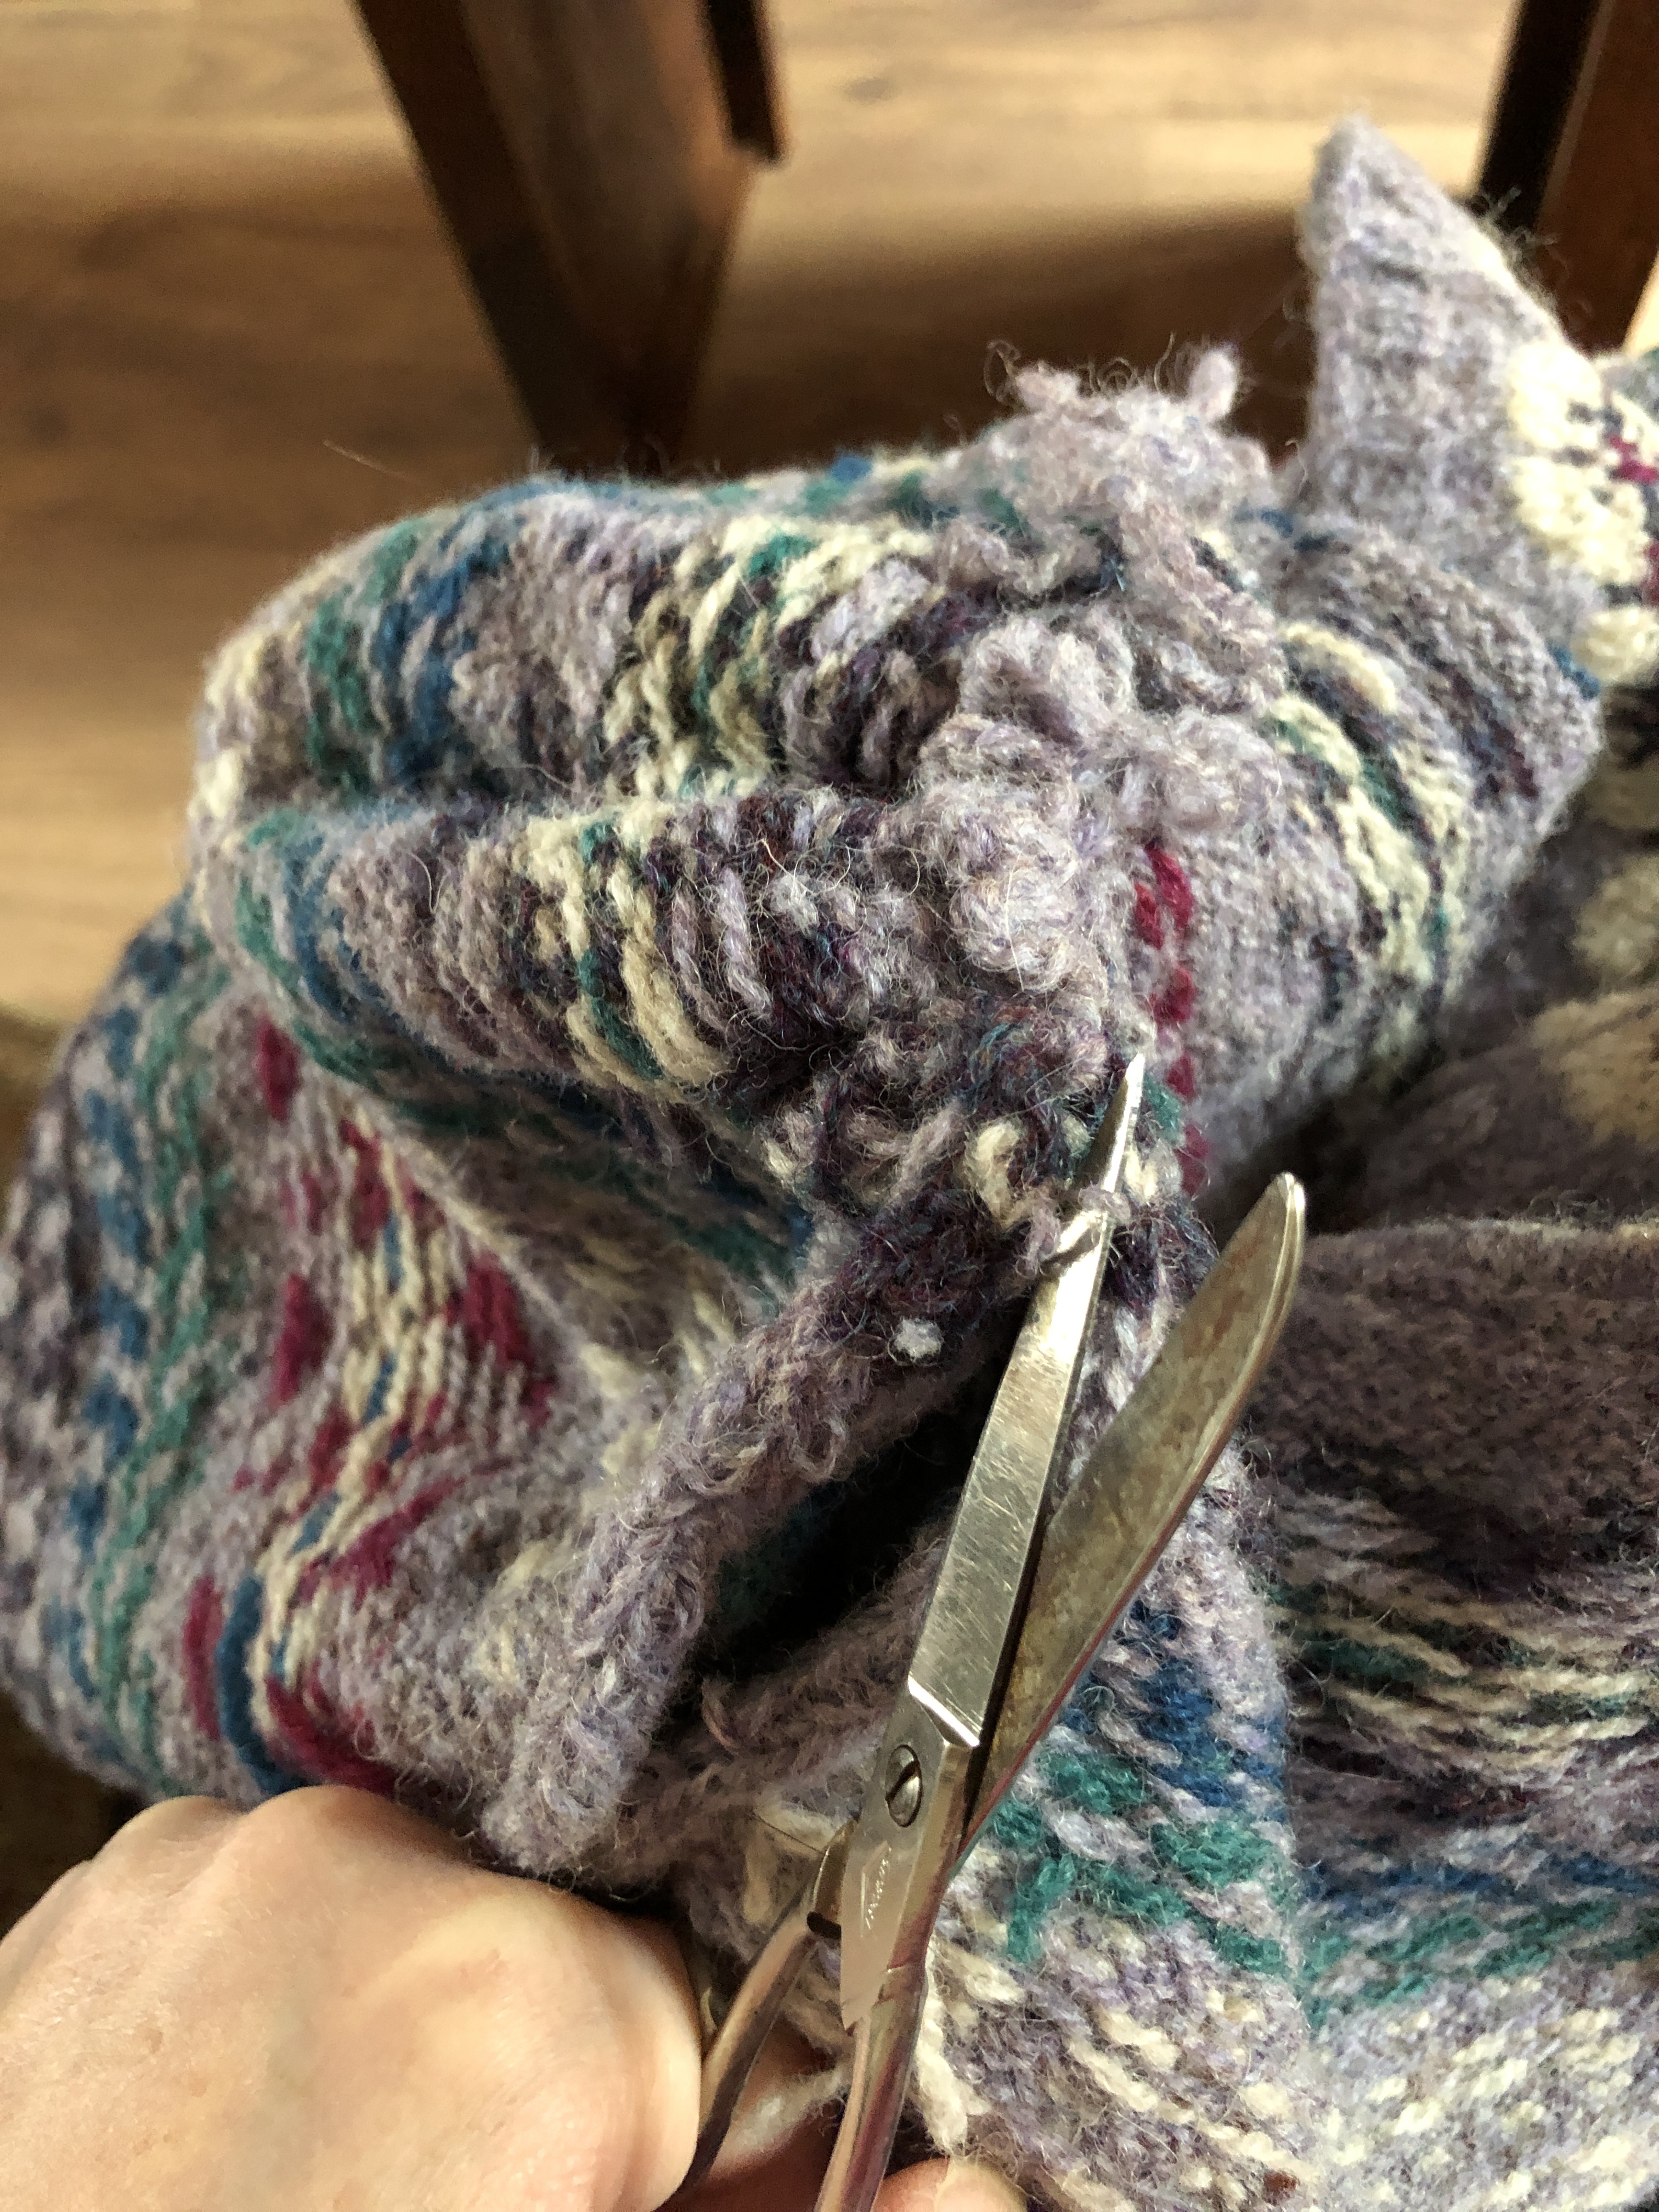
It took me a while to figure it out; but then I realised that when I knitted the garment in the round to the bottom of the sleeve, then changed to knitting the garment flat, I’d completely forgotten to check my new tension or adjust my needle size – so the top portion of the garment was much bigger than the bottom….There was only one option – to unpick both sleeves and sleeve heads, adjust, and sew up again.
I’m going in…!
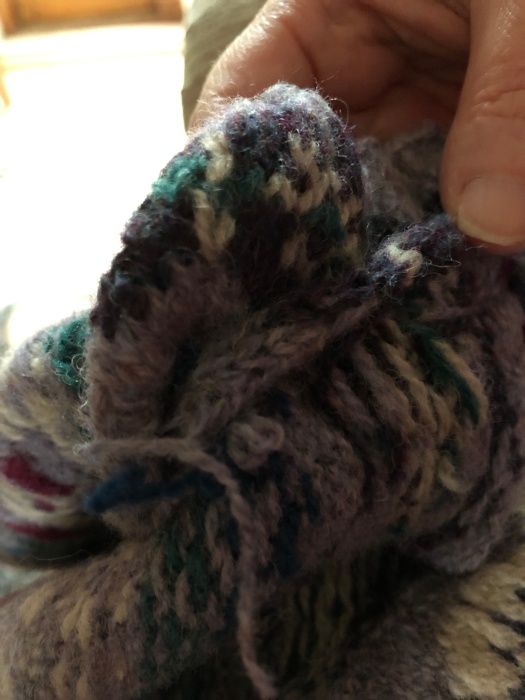
Once unpicked I adjusted the shoulder and sleeve head, taking an additional 2.5cm off the sleeve head, before sewing the sleeve back in, all the time ensuring the pattern matched up.
2.5cm taken from the sleeve head and 1.5cm from the sleeve
Looking better! Adjusted shoulders and sleeves completed!
So we live and learn! My Tuesday Tip? Check and re-check your tension as the tension difference between knitting in the round and in the flat can be much greater than you imagine!
Unlike the beginning and end of the 1940s, which began a year into WWII and ended in continued rationing in the UK, the 1950s heralded a birth and explosion in fashion and textile possibilities
For anyone who has seen Dior’s 1947 iconic ‘New Look’, this was an image of what was to come. Following the end of the Second World War in 1945, there remained a shortage of most textiles and accessories, including buttons, manmade fibres such as nylon and rayon (which had been developed in the 30s); and natural fibres including wool, cotton and silk. What Dior’s ‘New Look’ was seeking to achieve was approach fashion with renewed hope and new possibilities. It was usual for a Dior dress with a full skirt to use many metres of fabric – a wild extravagance when the silhouette of the 40s had been slim-lined. As the decade developed, jacket sleeves became wide and the swing coat, which sat perfectly over a full skirt, became popular, along with double breasted coats and an increased used of buttons and zips.
Unlike the previous decade, where colours and textiles had been limited due to a lack of dye and the war effort, the 1950s saw a riot of colour and technological advances in the creation of textiles. Oil was the new king, and with it came exciting developments in fossile fuel fibres, such as acrylic, polyester, triacetate and spandex. These new fibres were machine washable, easy to look after and long lasting; which appealed to the new generation and a nation bored with having to ‘make do’.
The silhouette of 1940s, which had been close fitting, with tailored skirts and crew neck shorter tops was replaced by full circle skirts, off the shoulder tops and long wraps. The role of women within society had changed too with the ending of the war. Women were no longer required to work in munitions factories; and many sought employment in office work, which was clean and well paid.
Female hairstyles in the 1950s became shorter; and hairdressing and haircuts came back into fashion, as women and girls benefited from increased wages. The same technology which developed textile dyes was used to create new exciting hair dyes and synthetic hair streaks, which could add glamour to hair; and the poodle cut, gamine, and a shorter curled wet set became popular, along with the ponytail and pompadour look. Hats and headscarves, which had been a staple of female fashion from the 1930s onwards, became less popular, as more time and effort was spent on creating voluminous hairdos.
Knitting and sewing were still popular, and home dressmaking remained fashionable, due in part to easily accessed home sewing machines and dress fabrics. In fact, the range of fabrics and yarn available to the populus increased, with a wide range of patterns in dressmaking fabrics, increased colour options in yarns and the introduction of thicker yarn (double double knit or ‘quick knit’) providing greater options for knitters.
My latest knit is the Hedy Tyrolean-Pattern Cardigan from the Knit Vintage pattern collection by Madeline Weston and Rita Taylor. This cardi has shorter sleeves and a fair isle motif panel on the front. I’ve decided to knit this in Shetland wool as the 2-ply wool from Jamiesons & Smiths lends itself perfectly to fair isle design and they hold a wide range of colours. I’ve chosen a heathered background yarn in a purple shade, with four contrasting colours of pink, aqua, yellow and green. These colours just pop right out of the cardigan and remind me of the the stripe colours found in sticks of seaside rock. It’s a fab design and I’m considering using different coloured buttons for the front to repeat the colours in the flower motifs. This vintage pattern is a real nod to the 1950s style, and I’m looking forward to teaming it with a full circle dress!
It’s an itch felt by anyone who works creatively. Musicians, artists, crafters and writers hold a skill that over time changes and develops. Knitting is just the same; and as our skills improve, we can reflect on past projects and wince at the clumsy mistakes we made.
A sloppily sewn up sleeve or a rushed neckline stands out like a belisha beacon now; and the urge to rectify these crude mistakes can be immense. I’ve felt the same about my fair isle knits, but learning to not throw the baby out with the bathwater is hard!
I’ve recently learned about colour dominance in fair isle knitting – a technique which now makes my past efforts look sloppy and poorly executed. When I look back at my first fair isle design I definitely feel this way! There are stitches in my pattern that should have been the dominant colour, but weren’t, so they get lost in the background. I designed my first fair isle pattern two years ago. I had completed the ‘Twinned With Roses’ cardigan in Susan Crawford’s ‘A Stitch In Time’ vintage knitwear book, which was a combination of fair isle and intarsia (there’s another blog to come about the different between the two), and I was eager to try my hand at designing a fair isle yoke with wool I’d purchased on a recent visit to friends in Reykjavik.
I knew the stitches didn’t all seem to sit right and that some of these were lost in the background, and now I have learned about colour dominance I shalln’t make the same mistake again. But what shall I do with my original jumper?? (I often wear it as I love the combination of colours and the feel of the Lopi 4 ply fleece from Icelandic sheep).
I’m a fairly competent seamstress and my sewing up isn’t bad; and as I’ve not split my stitches when sewing up I could unpick the set-in sleeves, the shoulders and part of the side seam, unravel the neckline and yoke and re-knit the yoke with my newly found, improved skills (I have actually considered doing this…is it me or is anyone else as persnickity??!?) or, I can leave this jumper, warts and all, as a reminder of the progress I’ve made in my techniques.
It feels as though there’s actually a much bigger picture here – in a world where we can make everything look perfect, there can be a tendency to apply this to our own creative skills – to remaster what we have already done. However, we stand to lose the history of our creative endeavours and pretend we started from a different point to where we really did; and there’s something disingenuous about this for me. So, the jumper stays! I shall continue to wear it with more pride in the history it conveys than the techniques employed; but it’s a honest documentation of my progress.
For many years I’ve loved vintage clothing and accessories, from Victoriana through to 1950s. The shapes and cut of clothes, the materials used and the embellishments have always appealed. I confess I am a magpie when it comes to anything shiny – whether it’s jewellery or the sheen of fabric or yarn, it catches my eye
So now, having knitted vintage inspired and original vintage patterns over the last fifteen years, it seems natural to progress towards creating my own designs; based on my love of vintage and love of anything shiny!! When it comes to shiny, there’s a number of ways to represent this in knitted form – through embossed patterns such as cables, bobbles and ribs, where the light reflects off the raised stitches, through the use of stitches such as moss stitch or broken rib where the light bounces around the changing stitches, and through the use of yarn, such as a pure or blended silk, cotton or linen, which naturally reflects the light around it.
I recently designed a 1920s inspired stole, along with two berets – one a close fitting beret and the other a more slouchy beret; and I’ve included one of these patterns as a free download!
Let’s be sociable! This pattern has a project page on my Ravelry, so if you download the pattern and knit the beret, please share your project results with me at my peggylilly Ravelry page!
My recently completed hand knitted 1920s inspired sampler stole and beret
I often receive compliments about my hand knits; but I’m reminded of how fearful many people are about washing their knits; so here’s my fail-safe guide to washing and storing; and a better PR for all things woolly!
“Oh, but you have to be so careful with wool don’t you?”
It’s not the first time I’ve heard it; and it’s likely to not be the last; but I often hear this said as a statement rather than a question; and each time I feel compelled to help alleviate fears about washing hand knits. To be honest, I think most of us have either had a bad experience with shrinking or felting a wool item, or we know someone else who has. And this can put people off of buying 100% wool; which is a real pity, as wool is a readily available by-product. Unlike its man made alternatives such as polyamide, nylon or acrylic, wool is warmer to wear; but also less likely to make us sweat, as its a natural and breathable fabric. Oh but how to wash it?
Well, as I often reply to the above statement – sheep don’t shrink! Just think about that for a minute. They really don’t, and they’re out in all weathers. Albeit with shelter; sheep live outside usually all year round, in wind, rain, hail, sleet, snow and sunshine; in cold, mild and warm temperatures and their fleece doesn’t shrink….
There are a few standard rules you have to follow for hand knits and pure wools though
Always use a wool cycle. Most front-loading machines have a wool cycle. If not, then when you next have to buy a washing machine, buy one with a wool cycle which carries the wool mark. Most machines will have a delicate cycle, but this isn’t the same as a wool cycle.
Wash at 30°C. Remember the sheep in the field? They’re not usually in temperatures exceeding 30°C (not here in the UK anyway!) so don’t wash your woolies on anything hotter. You will shrink or felt them. Going back to the point above, the wool cycle on a machine is 30°C and a delicate cycle is usually 40°C which is asking for disaster…
Don’t skimp on decent detergent. I would hope this goes without saying, but don’t buy cheap detergent and expect the results you want to see. You need a detergent that carries the wool mark to guarantee its safe to use on woolies. I prefer to use Woolite personally. It cost between £3.50 to £4; but it’s worth it in my experience. A good detergent will also help soften the fibres of your garment.
Don’t wash one wool item on its own. In my own experience, washing a load of woolies together means they’re less likely to be agitated or pulled about too much. If you want, you can use a pillow case for woolies, but I prefer to put all items in the machine together and skip the pillow case. If you’re struggling to make up a full load of wool, then consider adding knitted acrylic fibres to make the load up. Your acrylic knitted jumper and cardi will appreciate the extra care!
Don’t put woolies in the tumble dryer. Does anyone really think this might be a good idea?? Leave your woolies to dry naturally away from direct heat, draped over a clothes horse or airer. If your woolies have been stretched a bit you can gently pull them back into shape at this stage when they’re wet. Wool really is very forgiving if you take the care and patience to tend to it.
Don’t hang you woolies up. Wool garments need folding and storing flat in a cupboard or on a shelf. Hanging them will stretch them from the shoulders over time. Use moth balls or repellent to keep moths at bay. I have some lavender scented moth repellent which isn’t as strong smelling as moth balls but does the trick nicely.
Knit up a tension square. I know I’m always banging on about tension squares, but this is the ideal way to see how your wool is going to fair in your washing machine and will give you confidence when washing your completed garment.
Keeping to these simple rules will help ensure your knits stay looking good for years to come. Personally, I don’t think you can beat the feel of pure new wool against skin and it looks and lasts so much longer than it’s synthetic alternatives.
I think it’s every knitter’s nightmare question – the one that makes us all bang our foreheads on the nearest table. Why? Read on…..
Well for me, black is one of the coolest colours. It’s the colour that’s most readily been adopted by subcultures in the UK over the past sixty years from the 1950’s rockabilly look, through the beatniks of the 60’s, to the punks of the 70’s, the metal, goths and psychobilly movements of 80’s and beyond – black is the absence of light. And when it comes to knitting, that’s a problem.
Knitting to vintage patterns requires a knowledge and competence in the use of different stitches. As I explained in my ‘shapes and silhouettes of 1940s’ blog; embellishments were often too expensive or unobtainable, so an easy way to add definition to a knitted garment was to vary the stitches. In this way, definition could be added by the use of cables, bobbles, lace patterns and edging.
Cables and bobbles provide a three dimensional aspect to a garment, playing with the natural light and shade available. Lace patterns and scallop edging emphasize the spaces between stitches, playing with the negative space as much as the stitches. As black is the absence of light it does neither of these – it doesn’t emphasis the negative space or create shade; and therefore brings very little to the table. Of course it’s cool, it looks good with all other colours, but why bother spending time knitting what might be a complicated stitch pattern if you can’t see the stitches?
There are, as always, exceptions to this – for example, a yarn with a bright sheen, such as a high silk content where the light will bounce off the yarn can look really stunning. Likewise, black works well in combination with other colours where it can help showcase the colours in the scheme and make them ‘pop’ out.
Many a knitter has made the mistake of setting out on a project with great enthusiasm, to then be disappointed when the results of the hard work can’t be seen. I’ve done this myself. Never again. Then again, despite being a pig to knit with, not being able to see my stitches when knitting in black also means I can’t see my errors…..which is possibly some kind of pay off! Maybe ignorance is bliss!
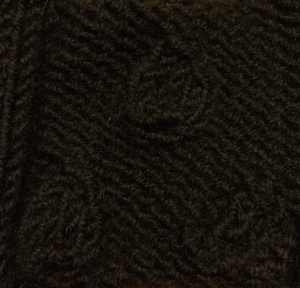
My original tension square in black
Droplet stitch in cream, this was the final colour I settled on
A glimpse into vintage fashion from the 40s and it’s commentary on society
‘Shapes’ and ‘silhouettes’ in fashion terms are the bare bones we start from when we talk about fashion styles. Each era of fashion has a ‘look’ – for example, 1940s fashion, as shown in the Victory Jumper above, is typified by shorter lines of tops, with skirts and dresses having a neat tailored look. Consider, in contrast, the long, flowing, evening dresses of 1930s, often portrayed in films from the Golden Age of Hollywood; and we begin to understand the meaning of ‘shape’ and ‘silhouette’ when we think about 1940s fashion.
I’ve now finished my vintage victory jumper (yey!) and am really pleased with the final result. As you can see, the fit is close, and the hem is shorter than what we find on sweaters from other eras. And there was very good reason for this. As my grandma used to say when she reminisced, “There was a war on you know…” and everyone was expected to do their bit. Textile and lace factories became (for a large part during WW2) munitions factories, worked by the munitionettes, the female factory workers. This meant there was limited access to fine textiles, so many women turned to their knitting needles for a new garment. My grandma told me stories of unravelling knitted garments once they were too small and using the yarn to make something new; so an old jumper, and a worn out hat and gloves might become a new tank top and matching hat, maybe knitted in a fair isle style to make use of all the odd bits of yarn around. Being knitted in fair isle meant it had a double thickness, making it a really warm garment around the yoke and chest area; an added bonus for winter!
Unlike the yarns of today that are wide and varied; ranging from cobweb and 2 ply, through to extra chunky, yarn in 40s Britain was usually 2, 3 or 4 ply. It wasn’t until the 50s that ‘quick knit’, as my grandma called it, was created. So most knitting patterns could be used with almost any yarn as the thickness or ply, was very similar. Knitting in fair isle, or using a pattern such as a cable or vandyke; also made a plain garment look a bit more fancier and added interest.
Likewise, on tailored garments from the 40s, embellishments were usually added in the form of a brooch. Ladies coats and jackets were usually single breasted, skirts and dresses had minimal buttons too as buttons were expensive; and metal buttons were unobtainable as they were melted down and required for the war effort. There was a real sense of clothes having to be functional and practical, over being beautiful; and a brooch was an easy, and sometimes the only way to add beauty and interest.
Hats were often worn by women; and ‘hat hair’ was a usual thing – infact, hair was usually washed and set just once a week. The line “I’m washing my hair” was a real thing, as washing and setting hair took a good hour, then usually dried overnight. Headscarves likewise were common place, especially for factory workers. Anyone whose worked in the textile industry, or any other factory can verify that the oil used for machinery sits on your skin and hair; so with a once a week wash a headscarf was a must!
So there you go – if you want to rock a 40s look you should keep an eye out for shorter line sweaters, single breasted coats and jackets, tailored skirts and dresses, headscarves, hats, brooches and a pin curl wetset! Oh, and a slick of red lippy! 🙂